Get your organization started: the Claude path.
Get started by deploying your first organization wide tool - an email unsubscribe tool. You will learn the building blocks needed to leverage Claude for your business.
Set up your connectors*
Share it with the org
* Alternatively, you can set up your connectors in a project: use the project path.
Set up your connectors.
Connectors let Claude work inside the apps your team already uses. Three clicks from any new chat gets you there.
Open the connector menu
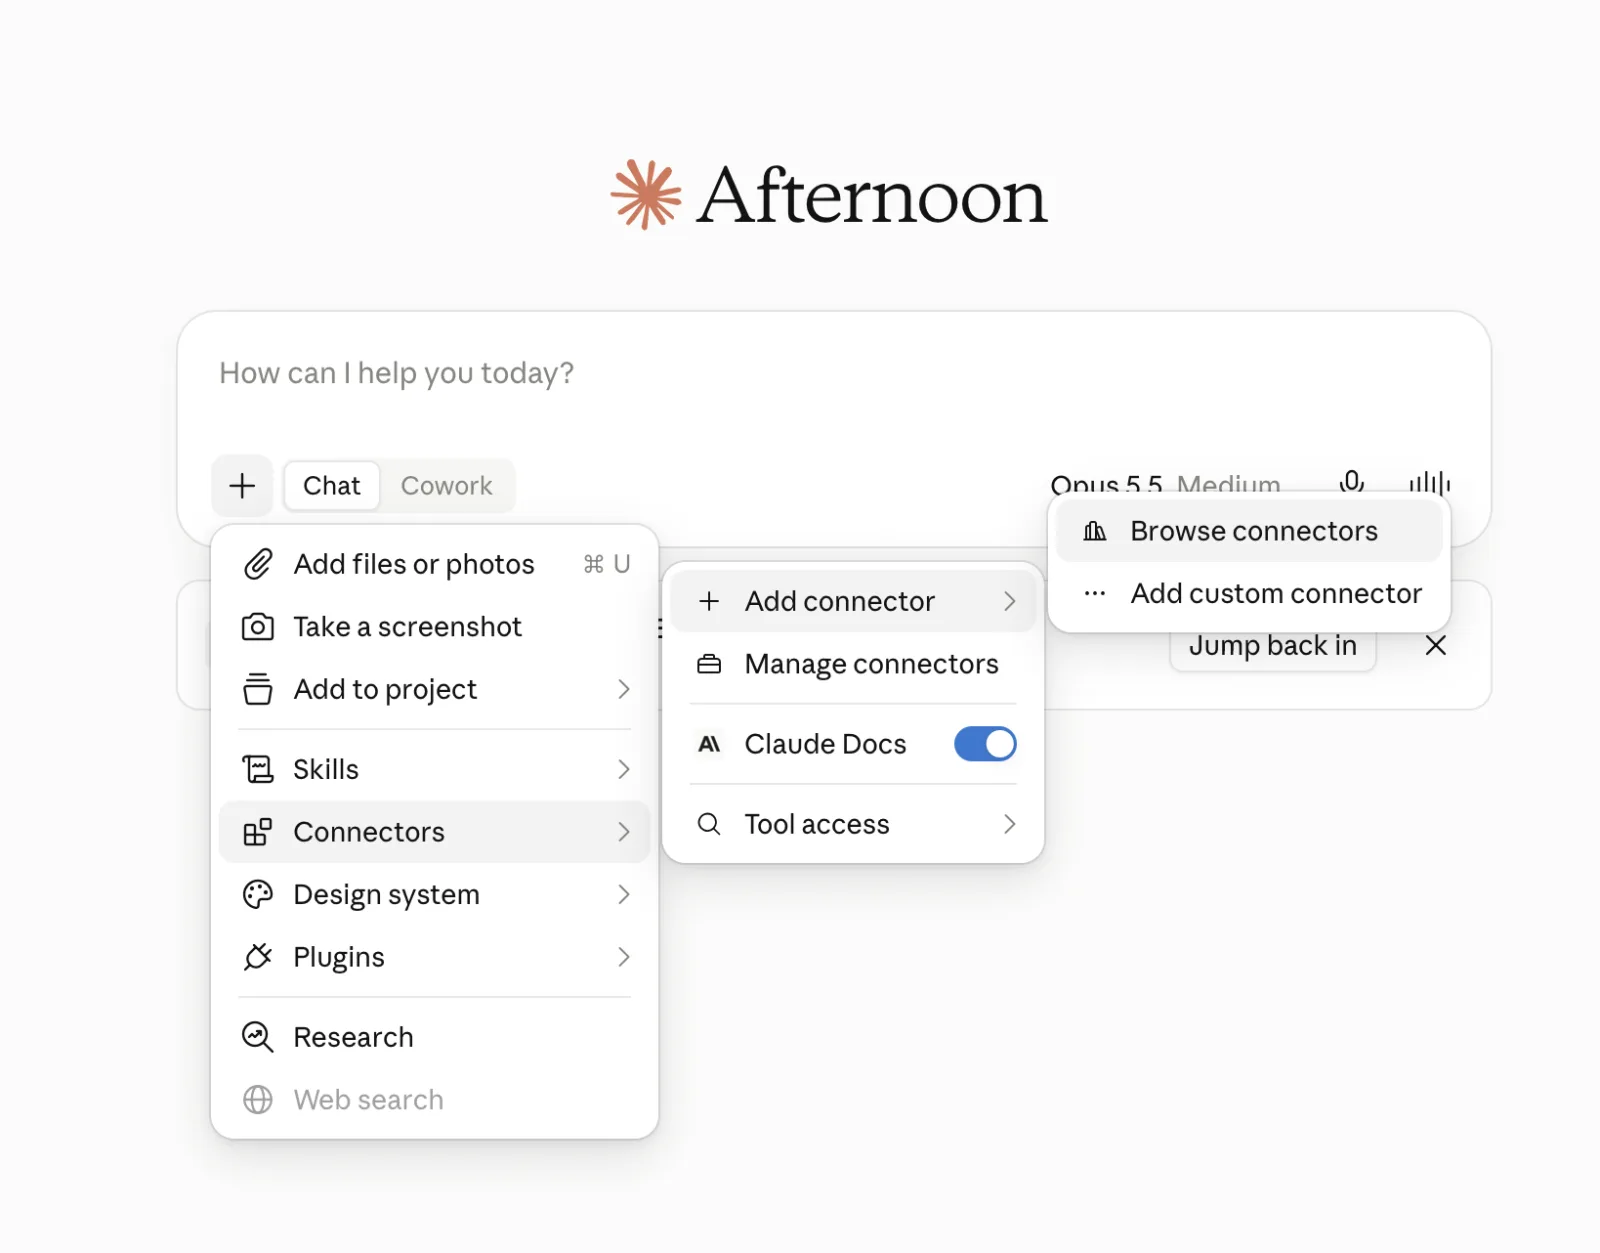
Open a new chat and click + under the message box. Choose Connectors → Add connector → Browse connectors.
Authorize a connector
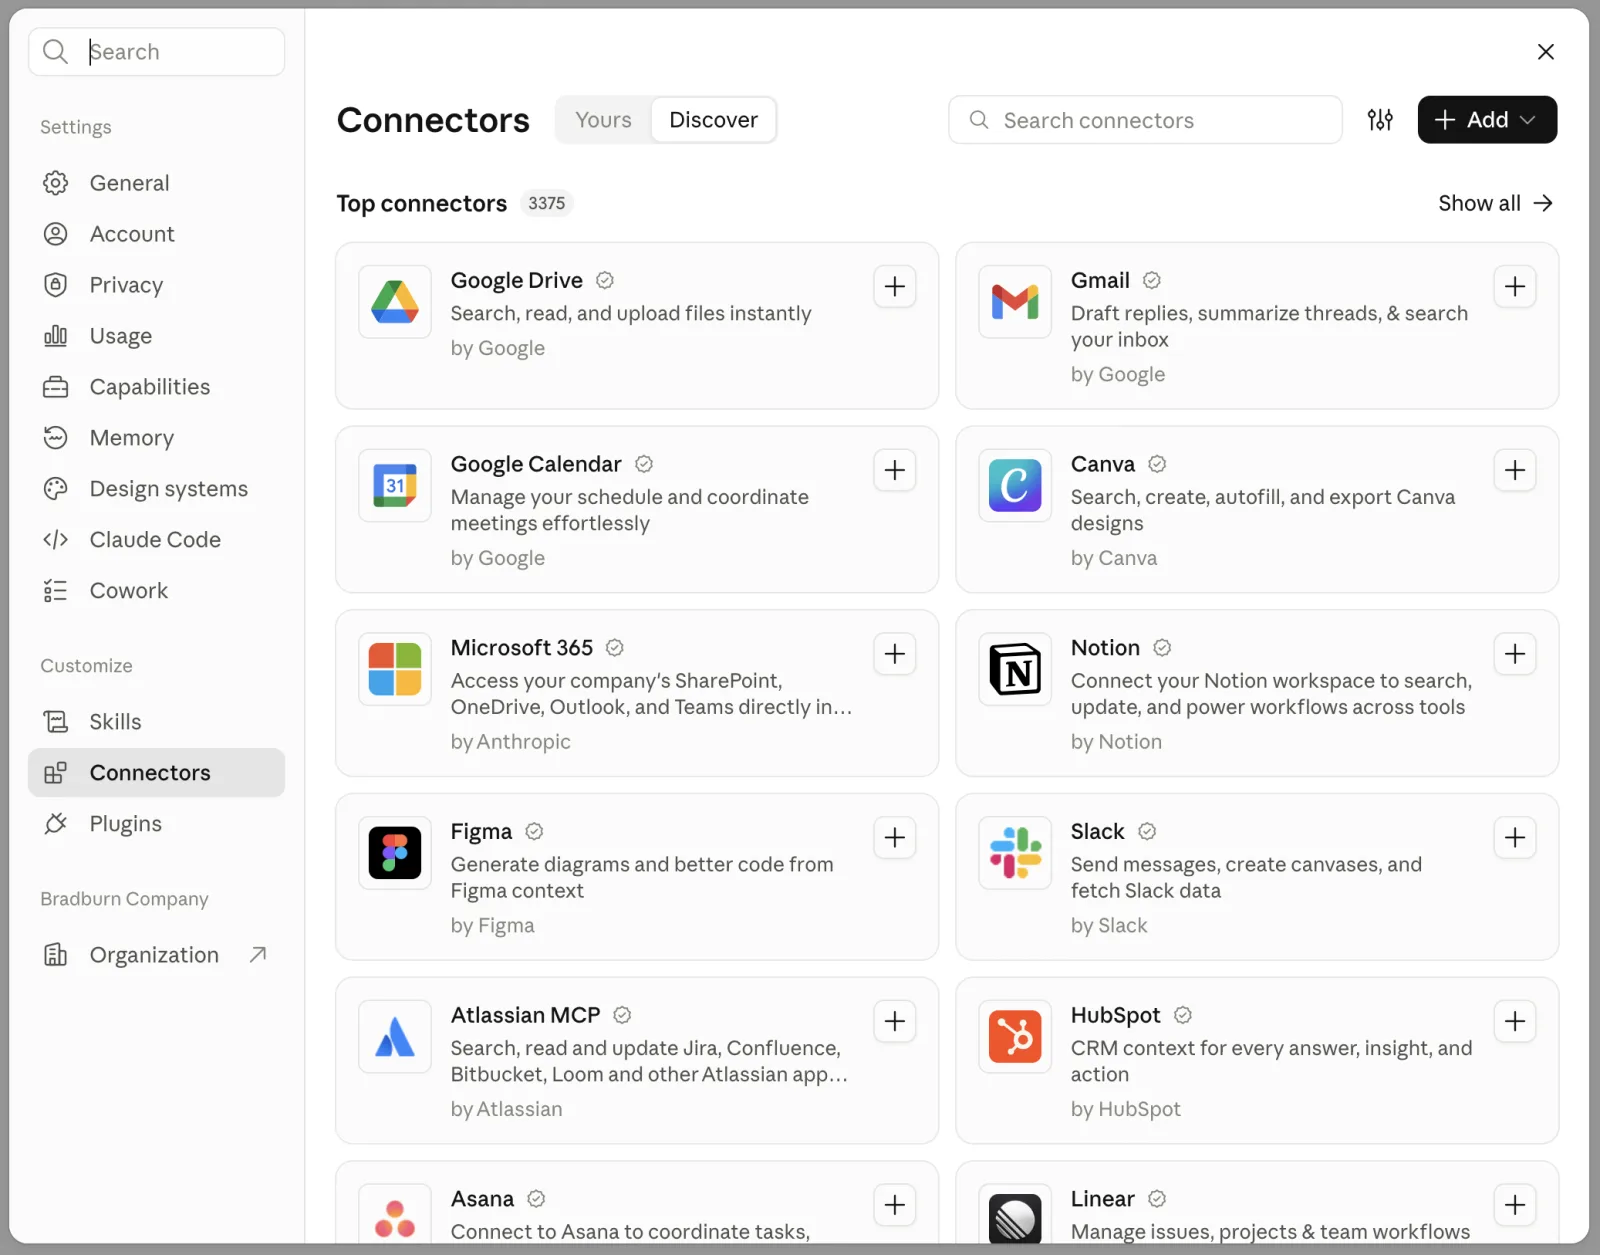
In Connectors → Discover, click + on the Gmail card and sign in with your Google account when prompted.
We're starting with Gmail because the first tool below uses it. Add as many as you like while you're here.
Check that they're on
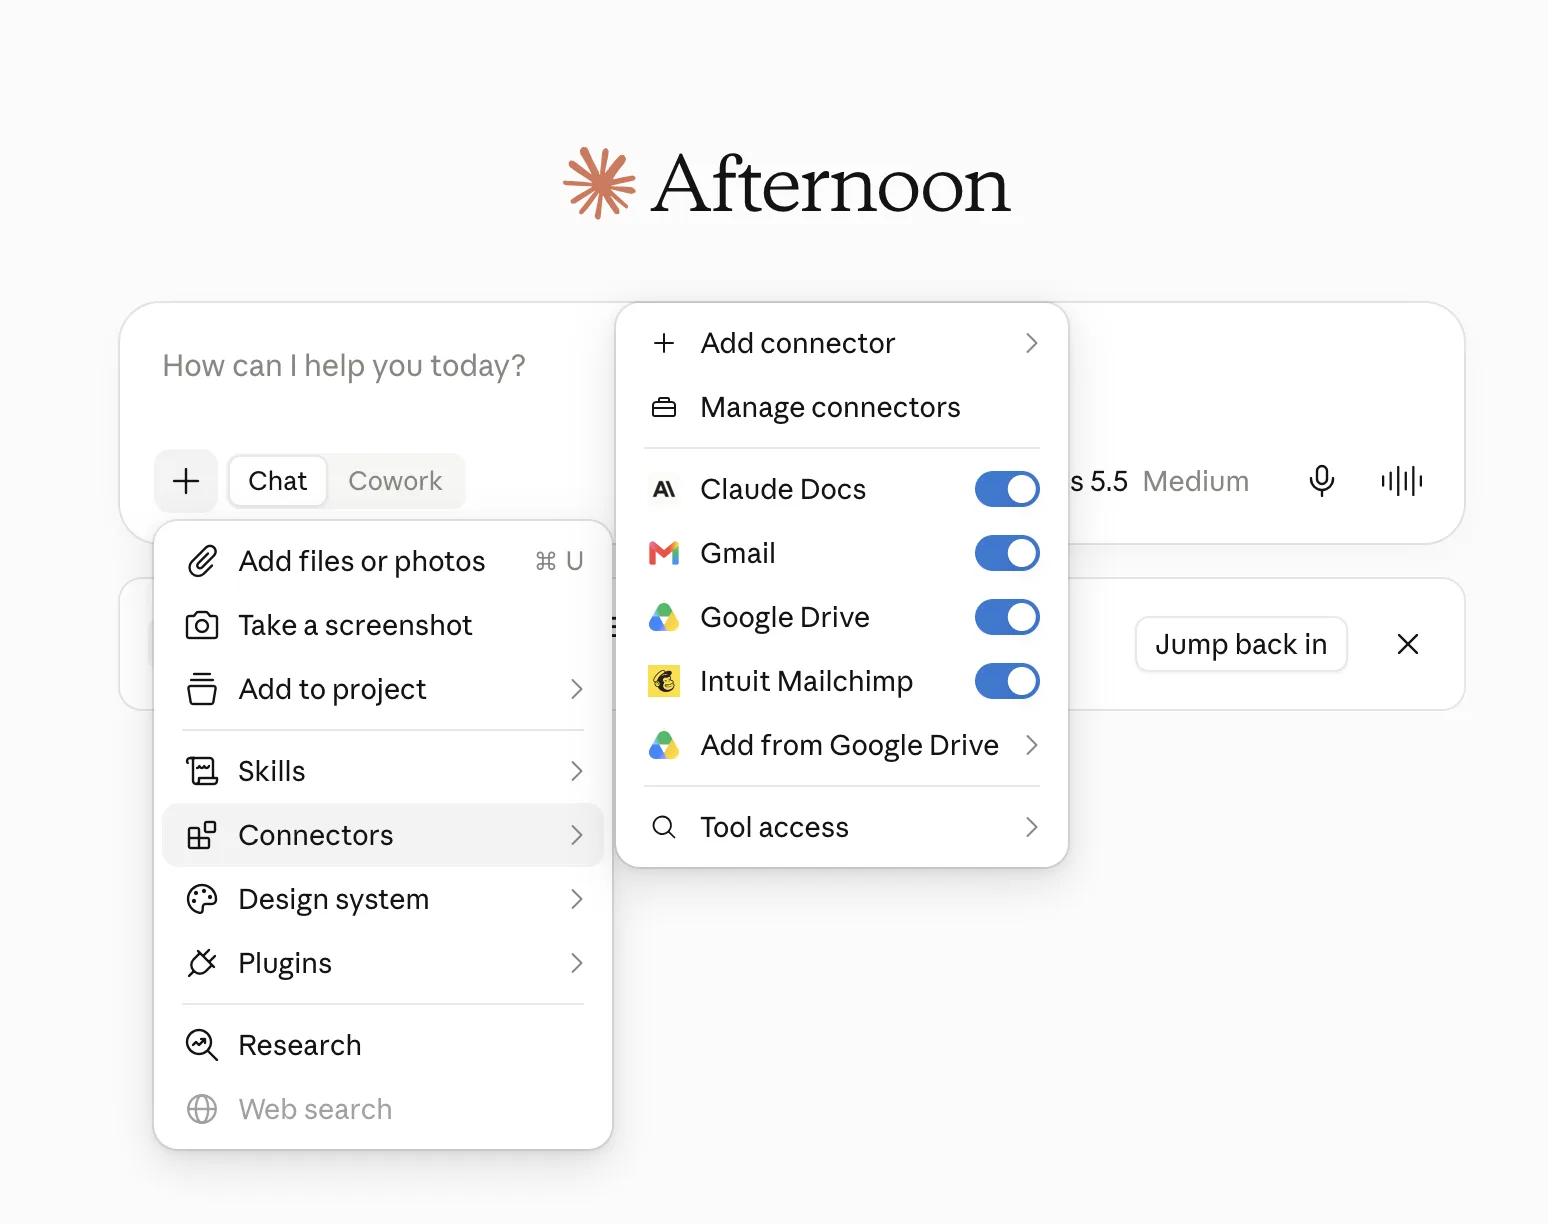
Back in the chat, click + → Connectors. Every connector you added shows a blue toggle. Turn one off to keep it out of a chat.
The next step
You don't need permission to build your own tools now.
We lay the AI foundation. Your whole team starts building.
Use your first tool.
Try a task with a connector
A quick test confirms the connectors work. This one uses Gmail to clear out unread subscription emails.
On the home screen in Chat, ask Claude to use a connector by name:
"Can you use my Gmail connector and help me unsubscribe from emails landing in my primary inbox that I haven't opened in the past 30 days?"
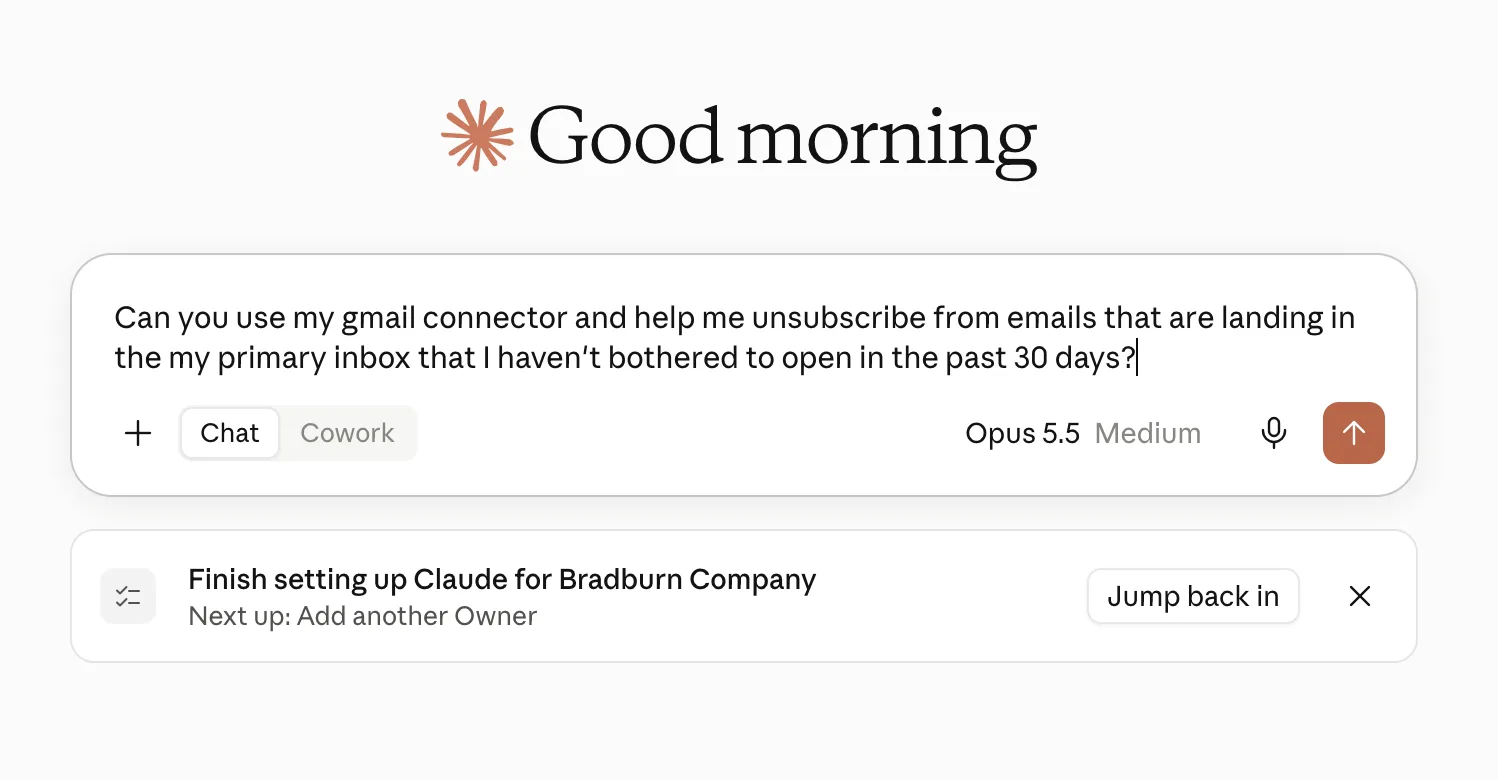
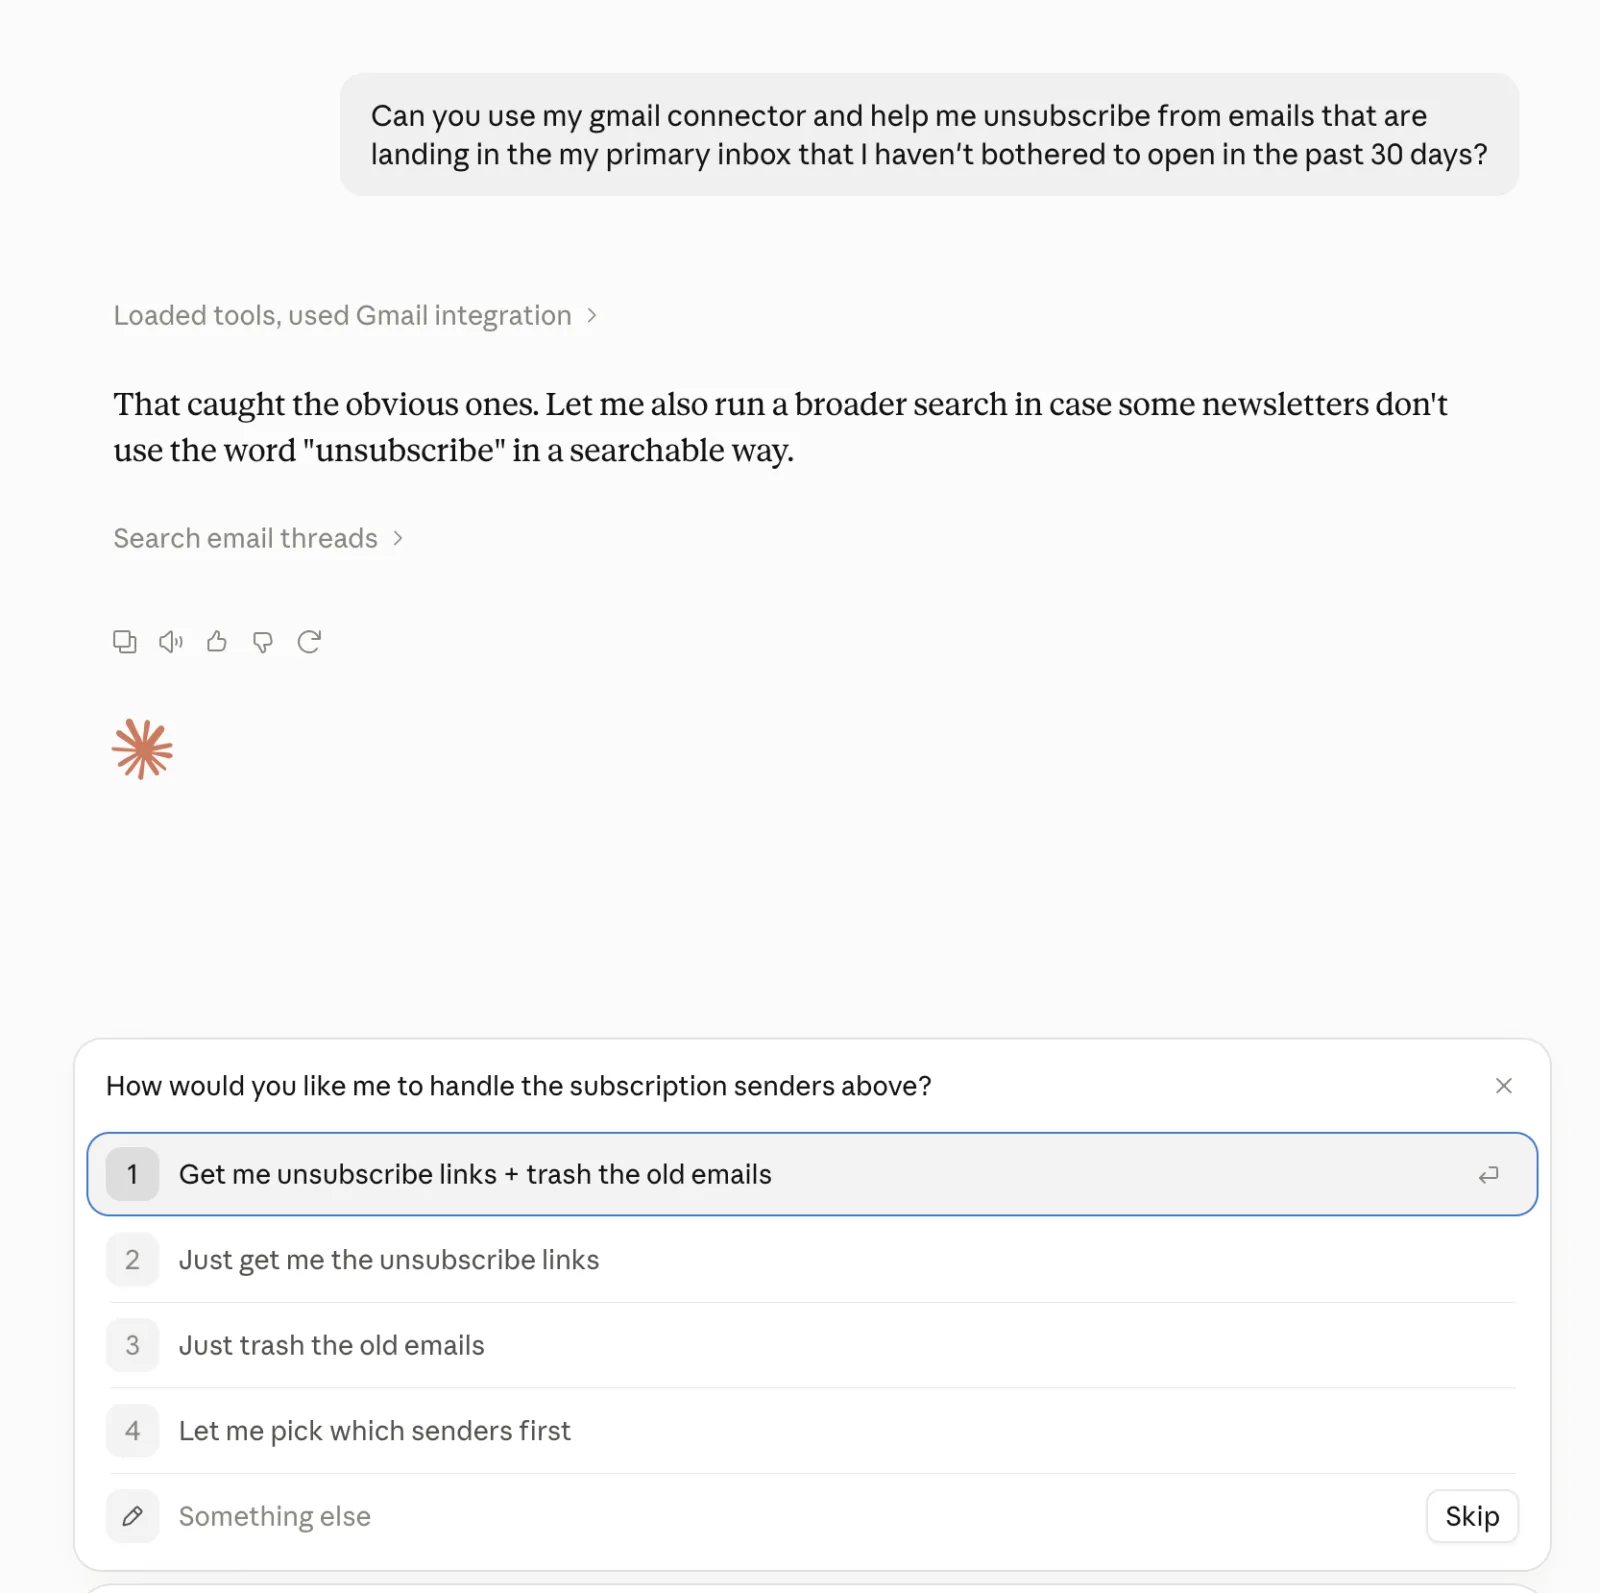
Claude searches your inbox and, in this case, offers some suggestions on how to proceed. I'm selecting the option Get me unsubscribe links + trash the old emails for this example.
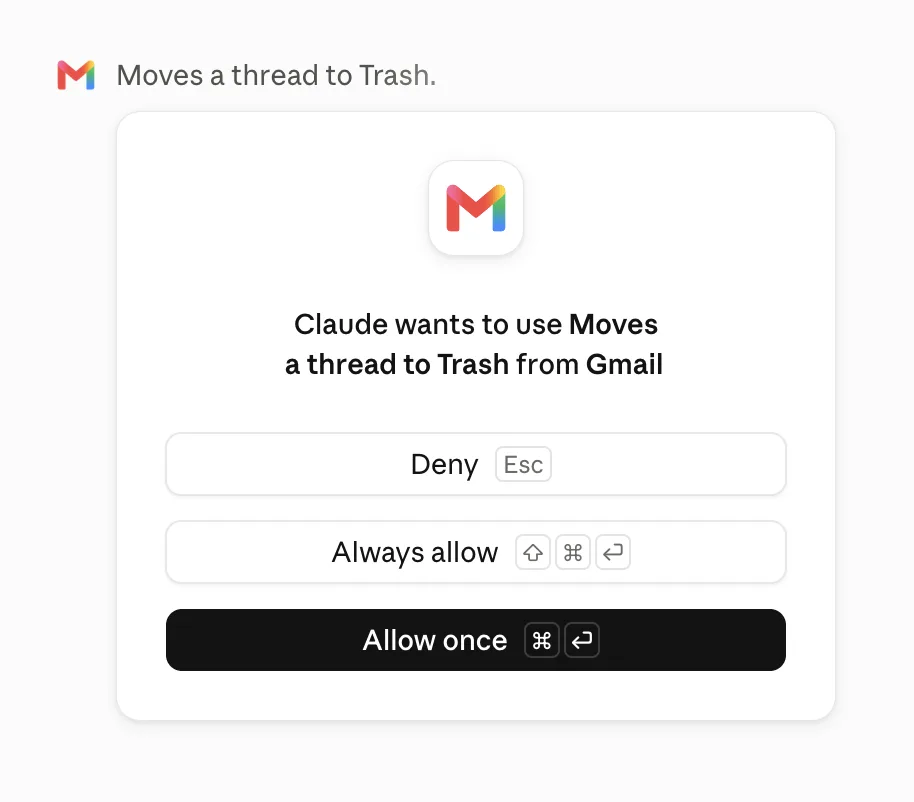
Before Claude changes anything, it asks. Allow once approves this action, Always allow skips future prompts for it, and Deny stops it.
Don't want Claude to ask every time? You can change that in your settings. See Manage tool permissions below.
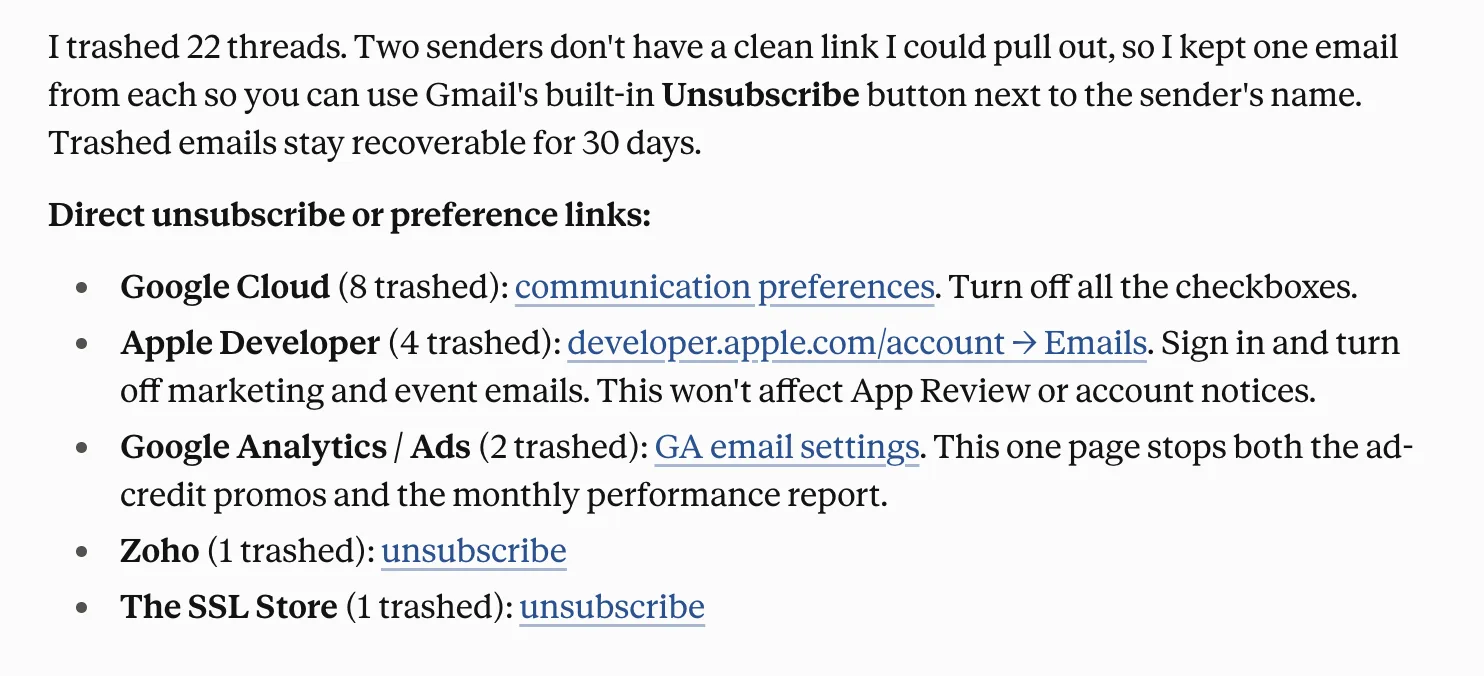
Claude reports what it did and lists unsubscribe or preference links for each sender. Trashed emails stay recoverable in Gmail for 30 days.
And there you go. You've used your first tool to make your life easier.
Manage tool permissions
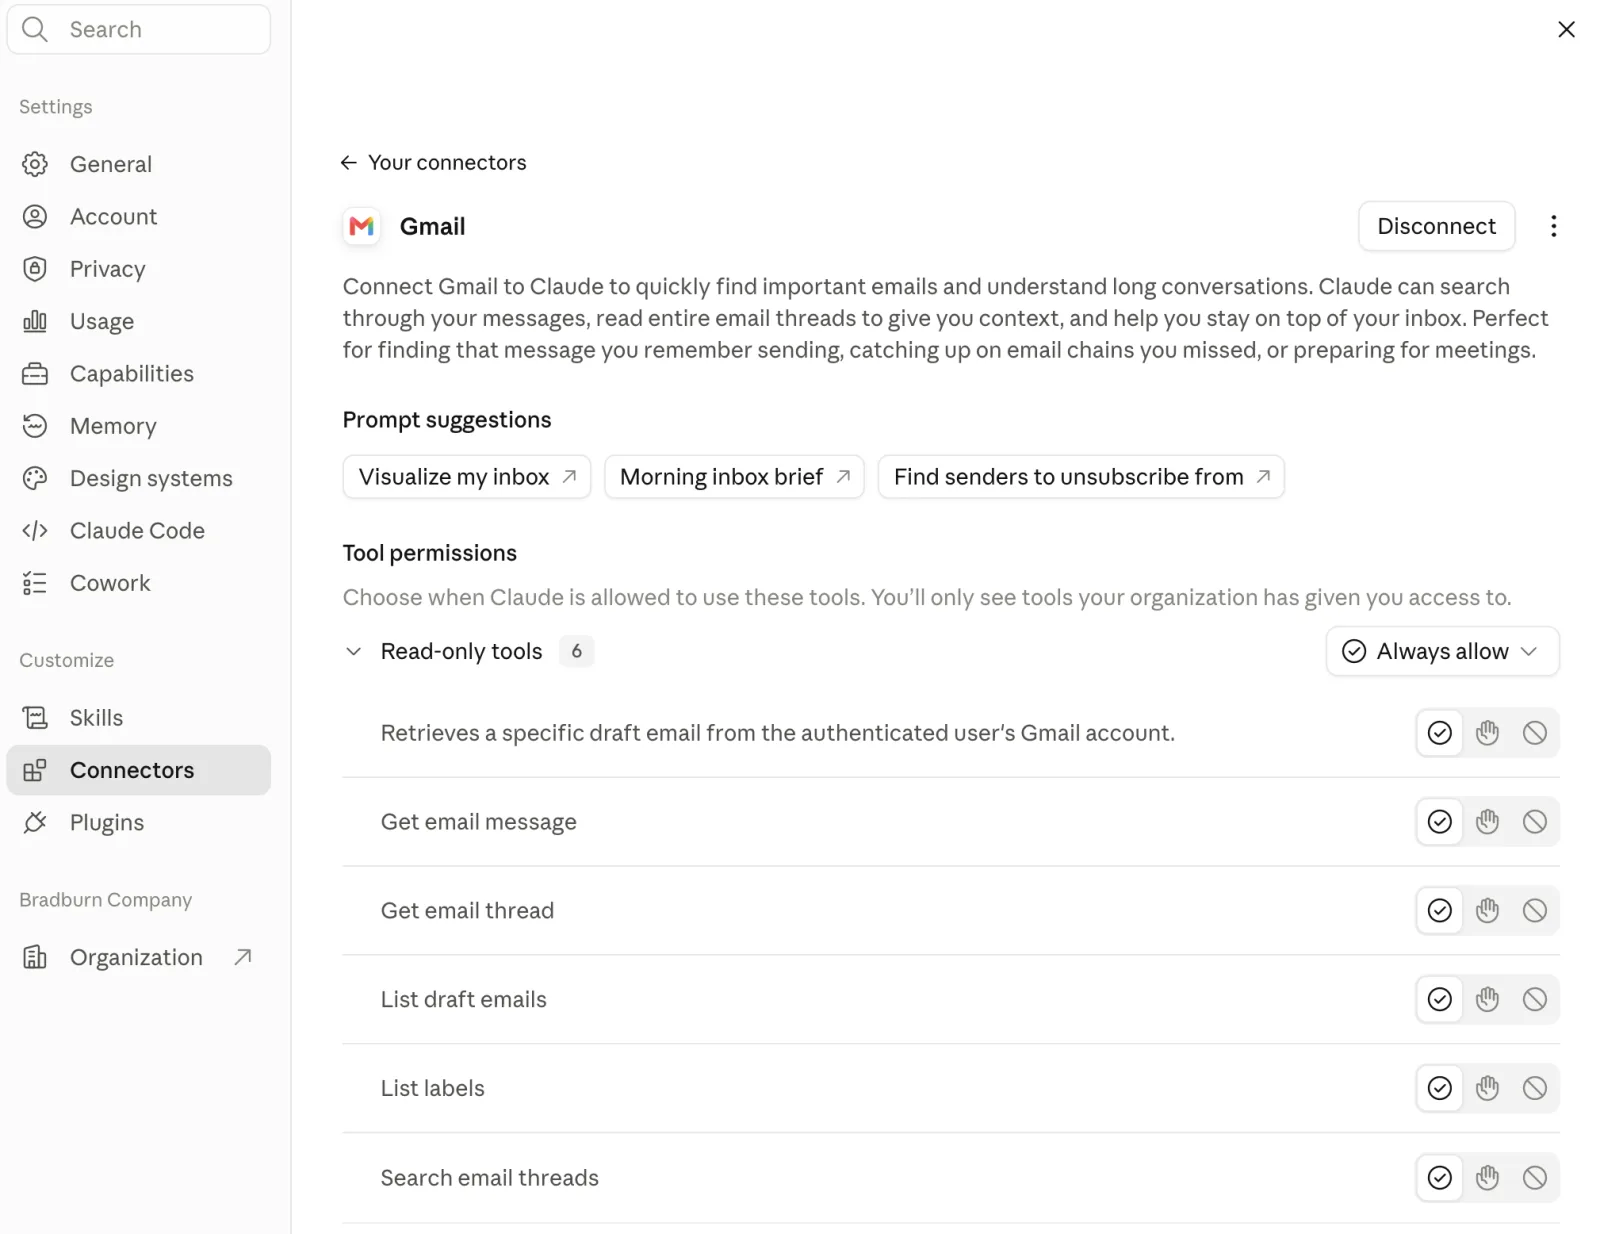
Go to Settings → Connectors and open a connector, like Gmail. Under Tool permissions, set each tool (or a group, like Read-only tools) to always allow, ask first, or block. You'll only see tools your org has given you. The page also has Prompt suggestions and a Disconnect button.
Share it with the org.
Turn the task into a skill
A skill saves a workflow so Claude repeats it the same way next time. Publishing puts it in the org library for everyone.
Create and save the skill
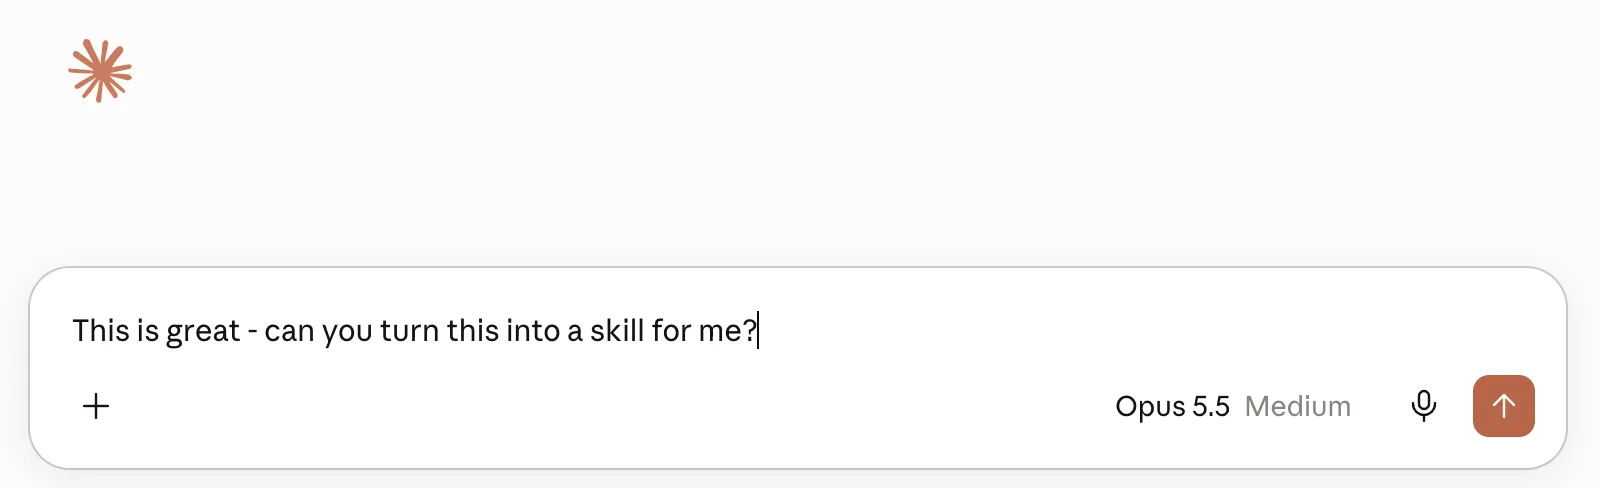
After a task goes well, ask in the same chat: "Can you turn this into a skill for me?"
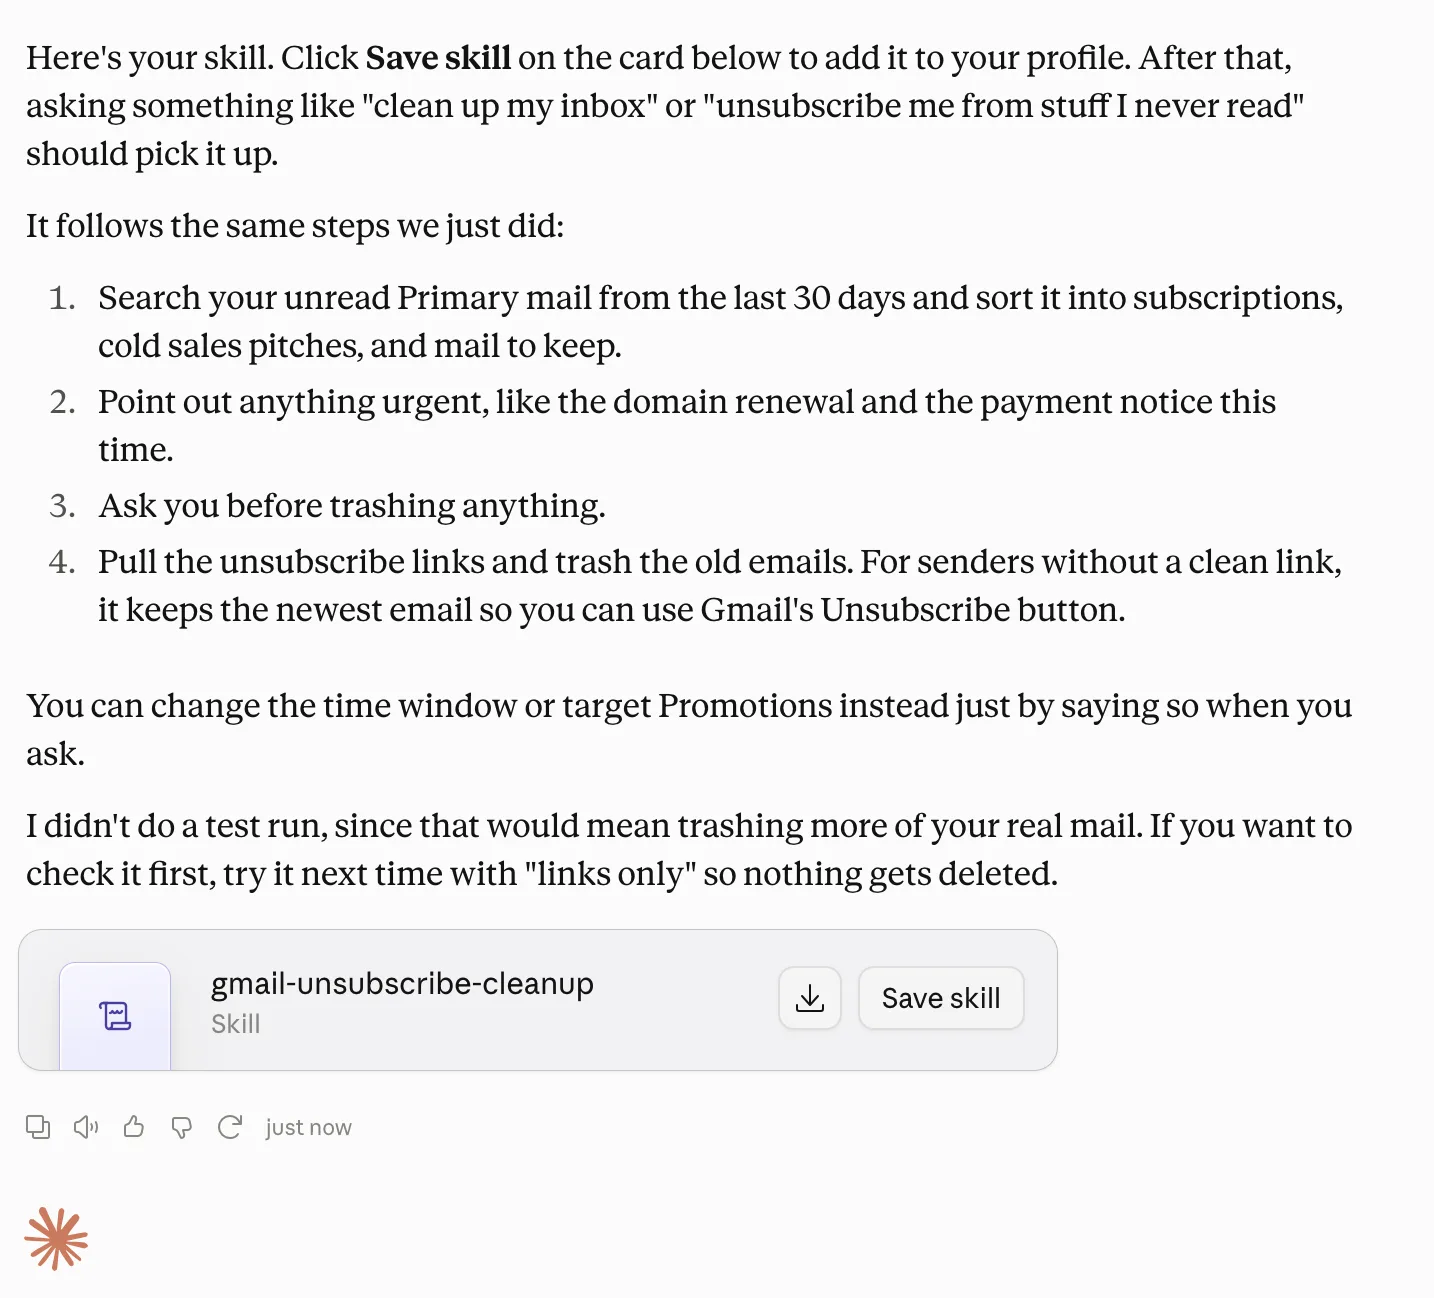
Claude summarizes the skill and shows a skill card. Save skill adds it to your profile; the download icon saves the file. From then on, similar requests ("clean up my inbox") use it.
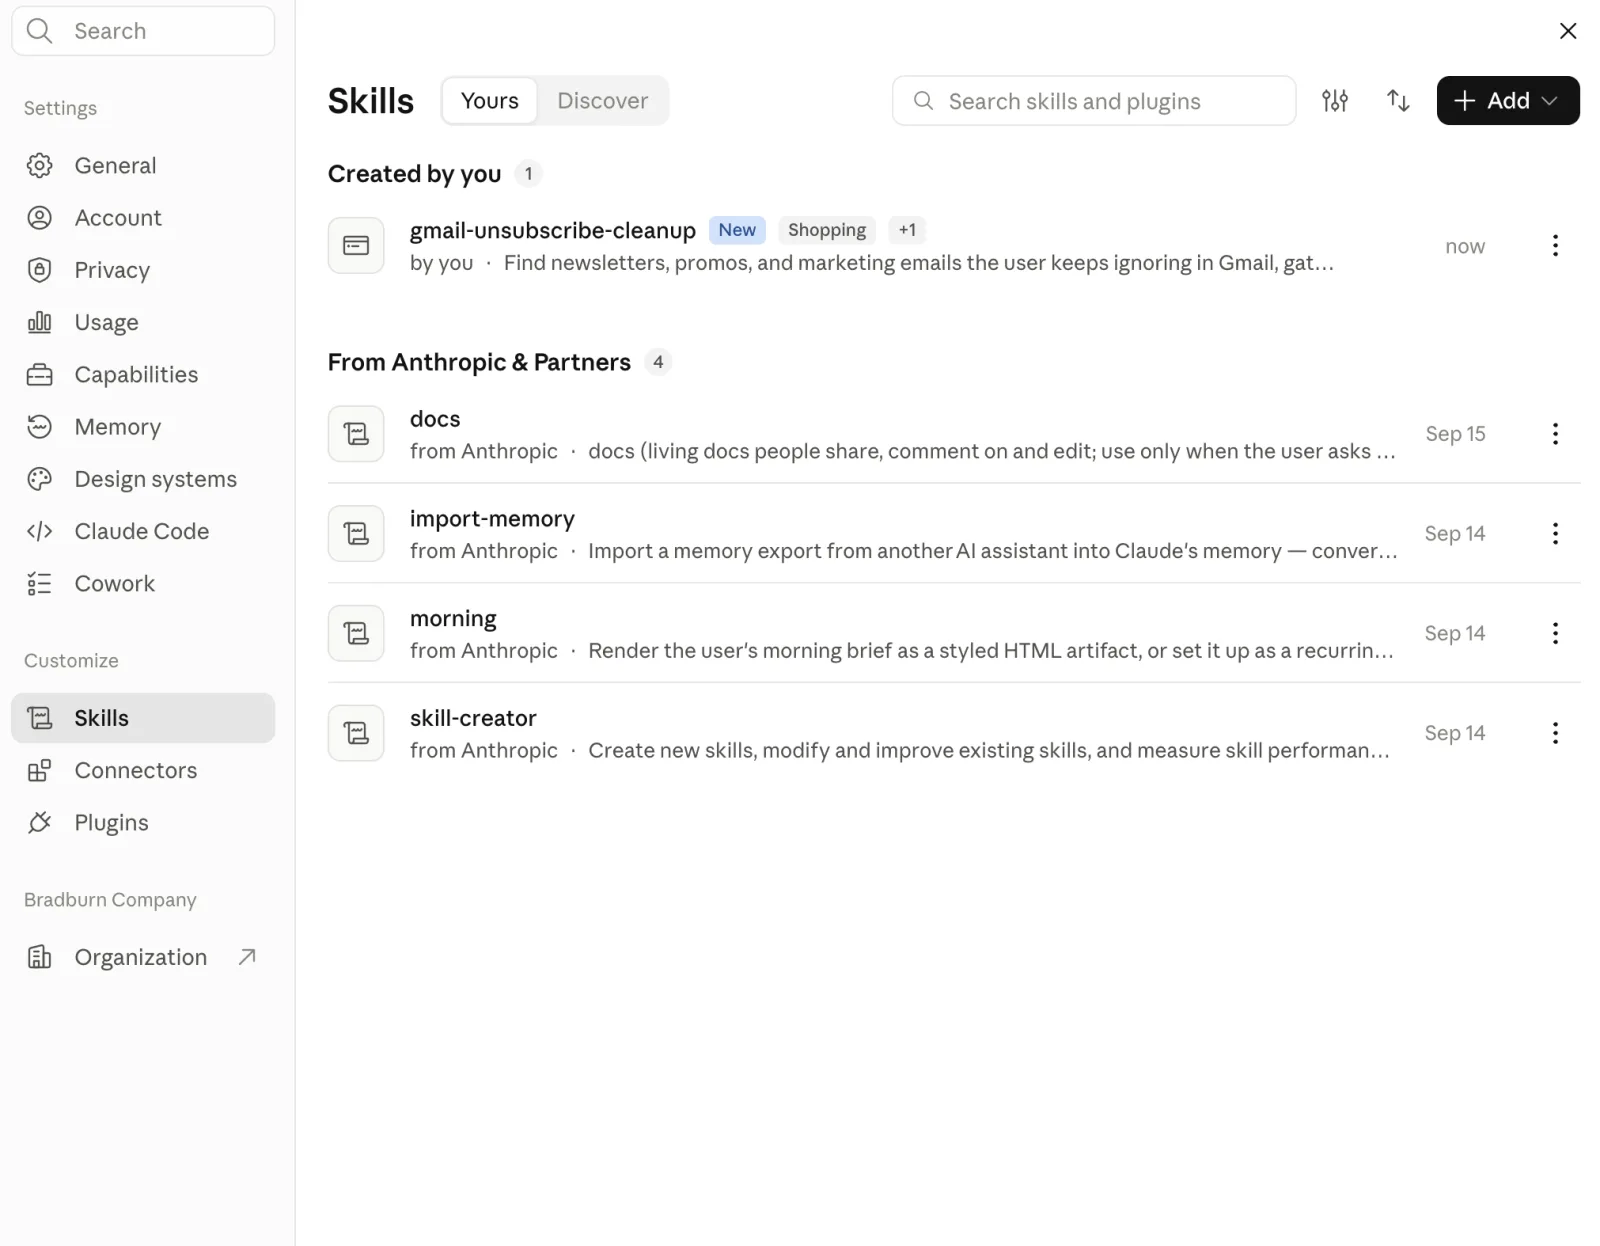
Find it under Settings → Skills → Yours, listed under Created by you.
Share or publish it
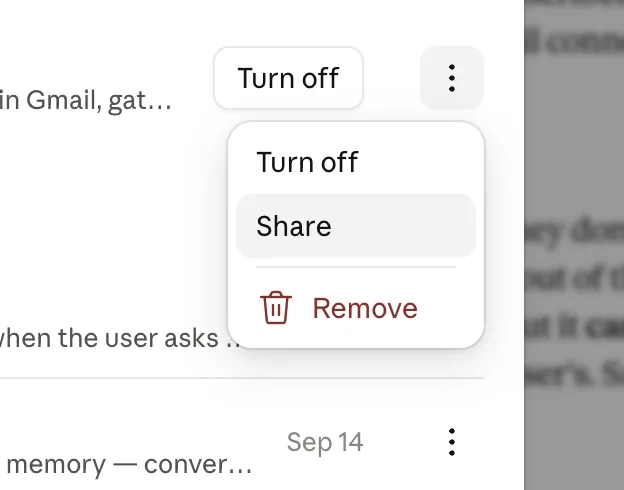
Click the ⋮ menu next to the skill: Turn off, Share, or Remove.
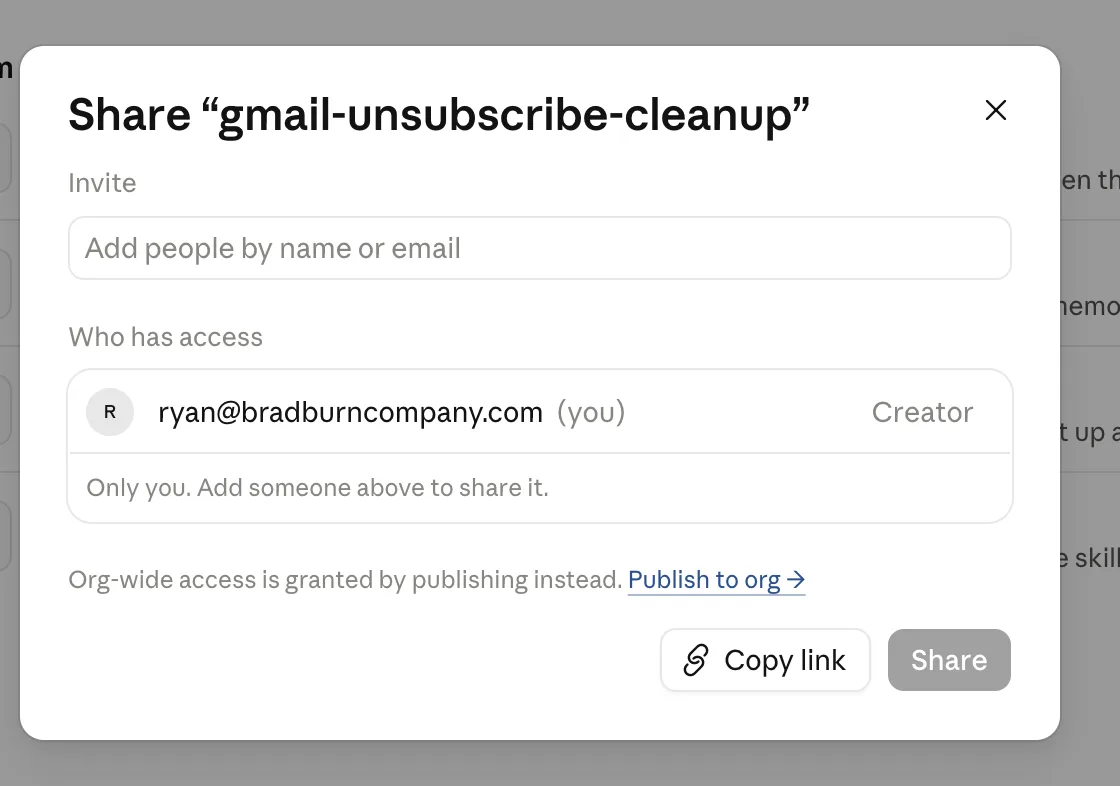
Share invites specific people by name or email, or Copy link. For everyone in the org, click Publish to org. For our tutorial, we are going to make our skill available to the entire org via the Publish to org link.
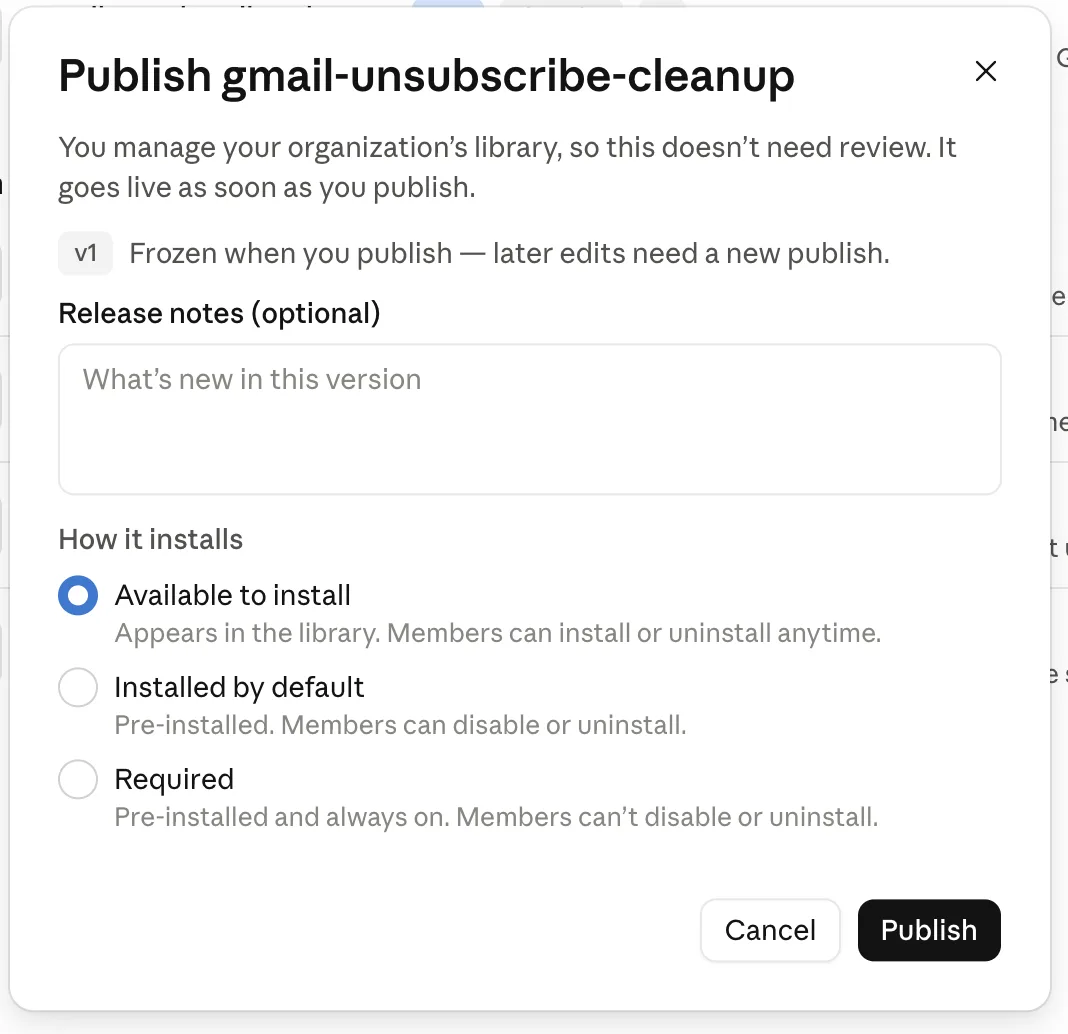
In Publish, add optional release notes, choose how it installs, and click Publish. As an org admin, your publish skips review and goes live right away. The version (v1) is frozen; later edits need a new publish.
| Option | What members get |
|---|---|
| Available to install | Listed in the library; install or uninstall anytime |
| Installed by default | Pre-installed; members can disable or uninstall |
| Required | Pre-installed and always on |
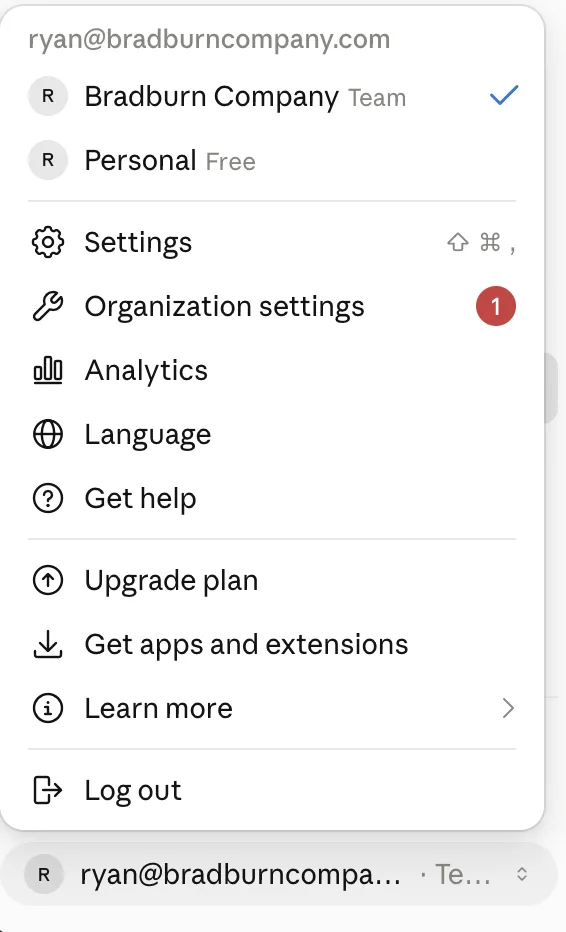
Check it in Organization settings
Click your name at the bottom left, then Organization settings.
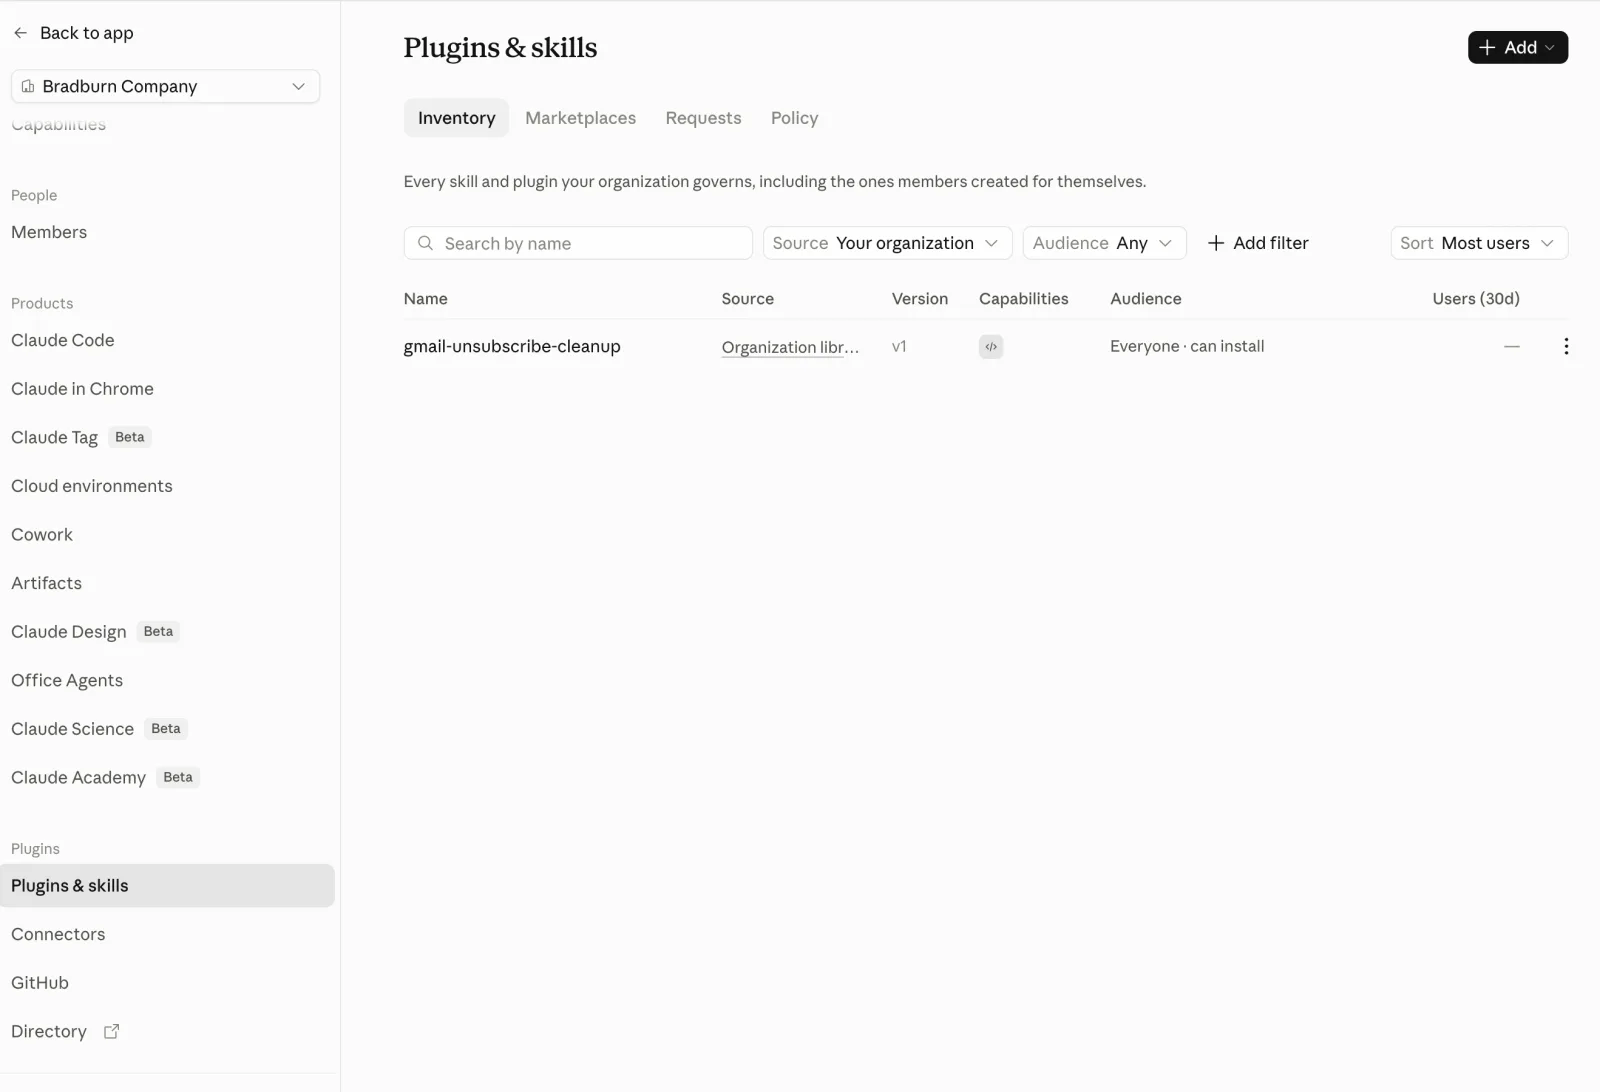
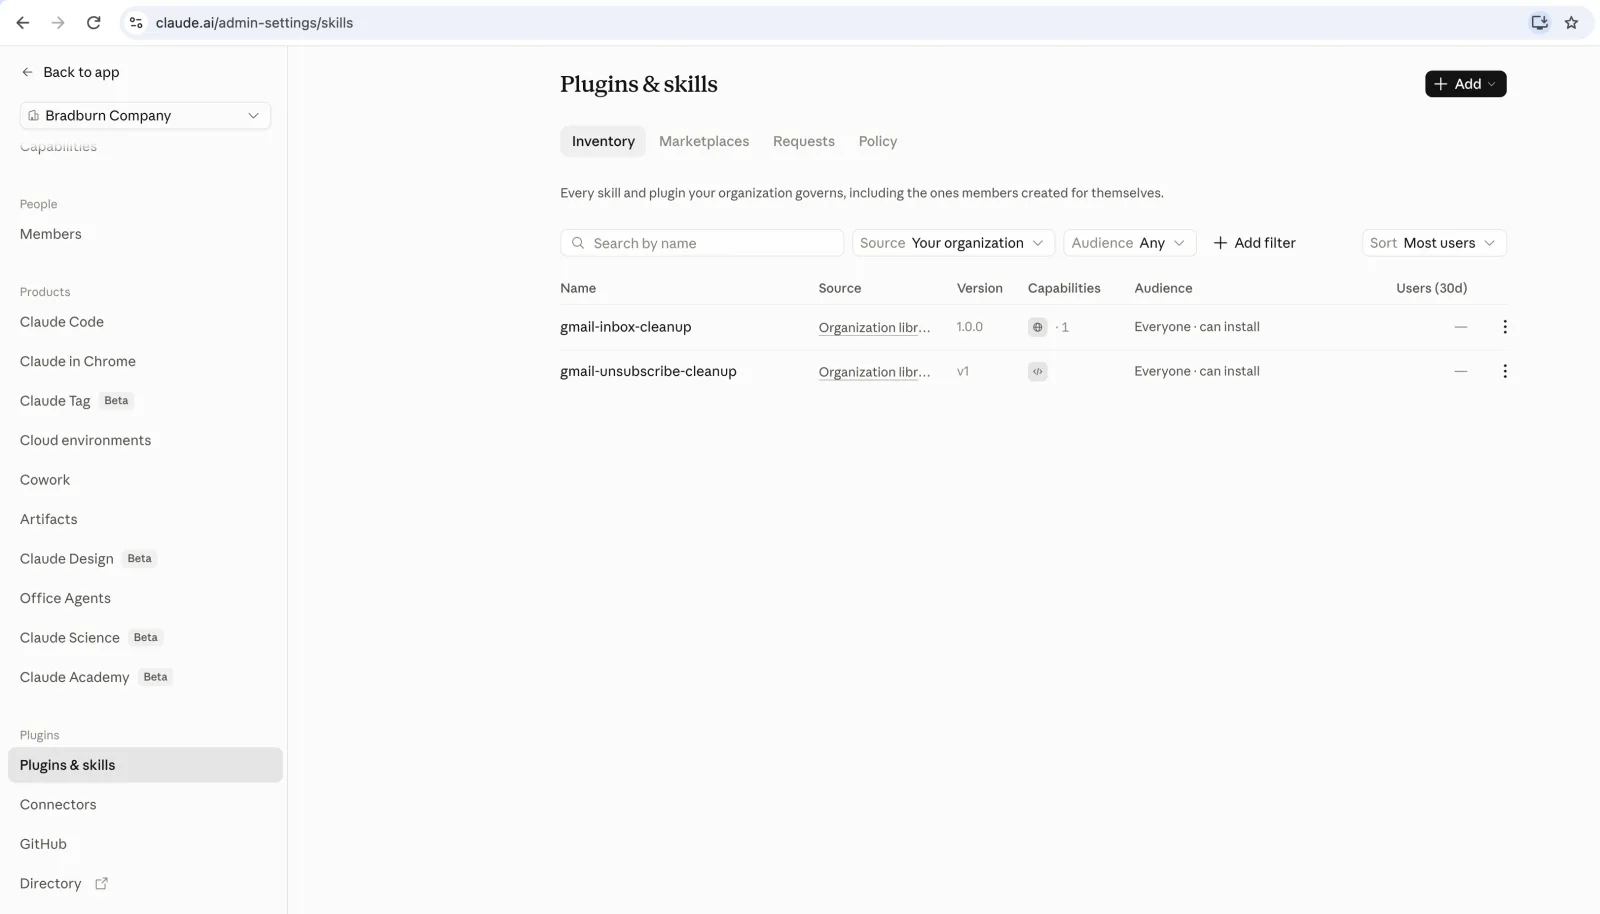
Go to Plugins → Plugins & skills → Inventory. The skill appears with its source, version, audience ("Everyone · can install"), and 30-day user count.
Package it as a plugin
A plugin bundles a skill with the connector it needs, so members install one thing and get both. Here, the Gmail connector and the gmail-unsubscribe-cleanup skill become one plugin.
Build the plugin
In the same chat, ask: "Can we now create a plugin that packages up the Gmail connector with this skill?"
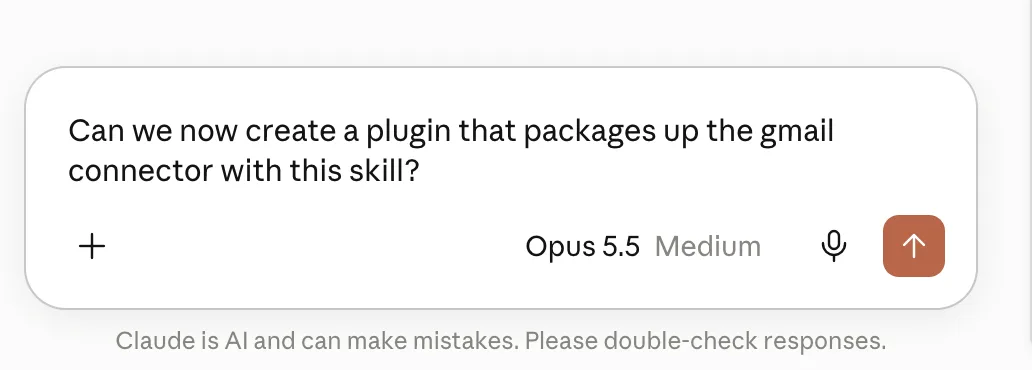
Claude builds a .zip with three parts: the connector config (.mcp.json), the skill, and a manifest plus README. Anyone who installs it signs in with their own Google account on first run. Click Download.
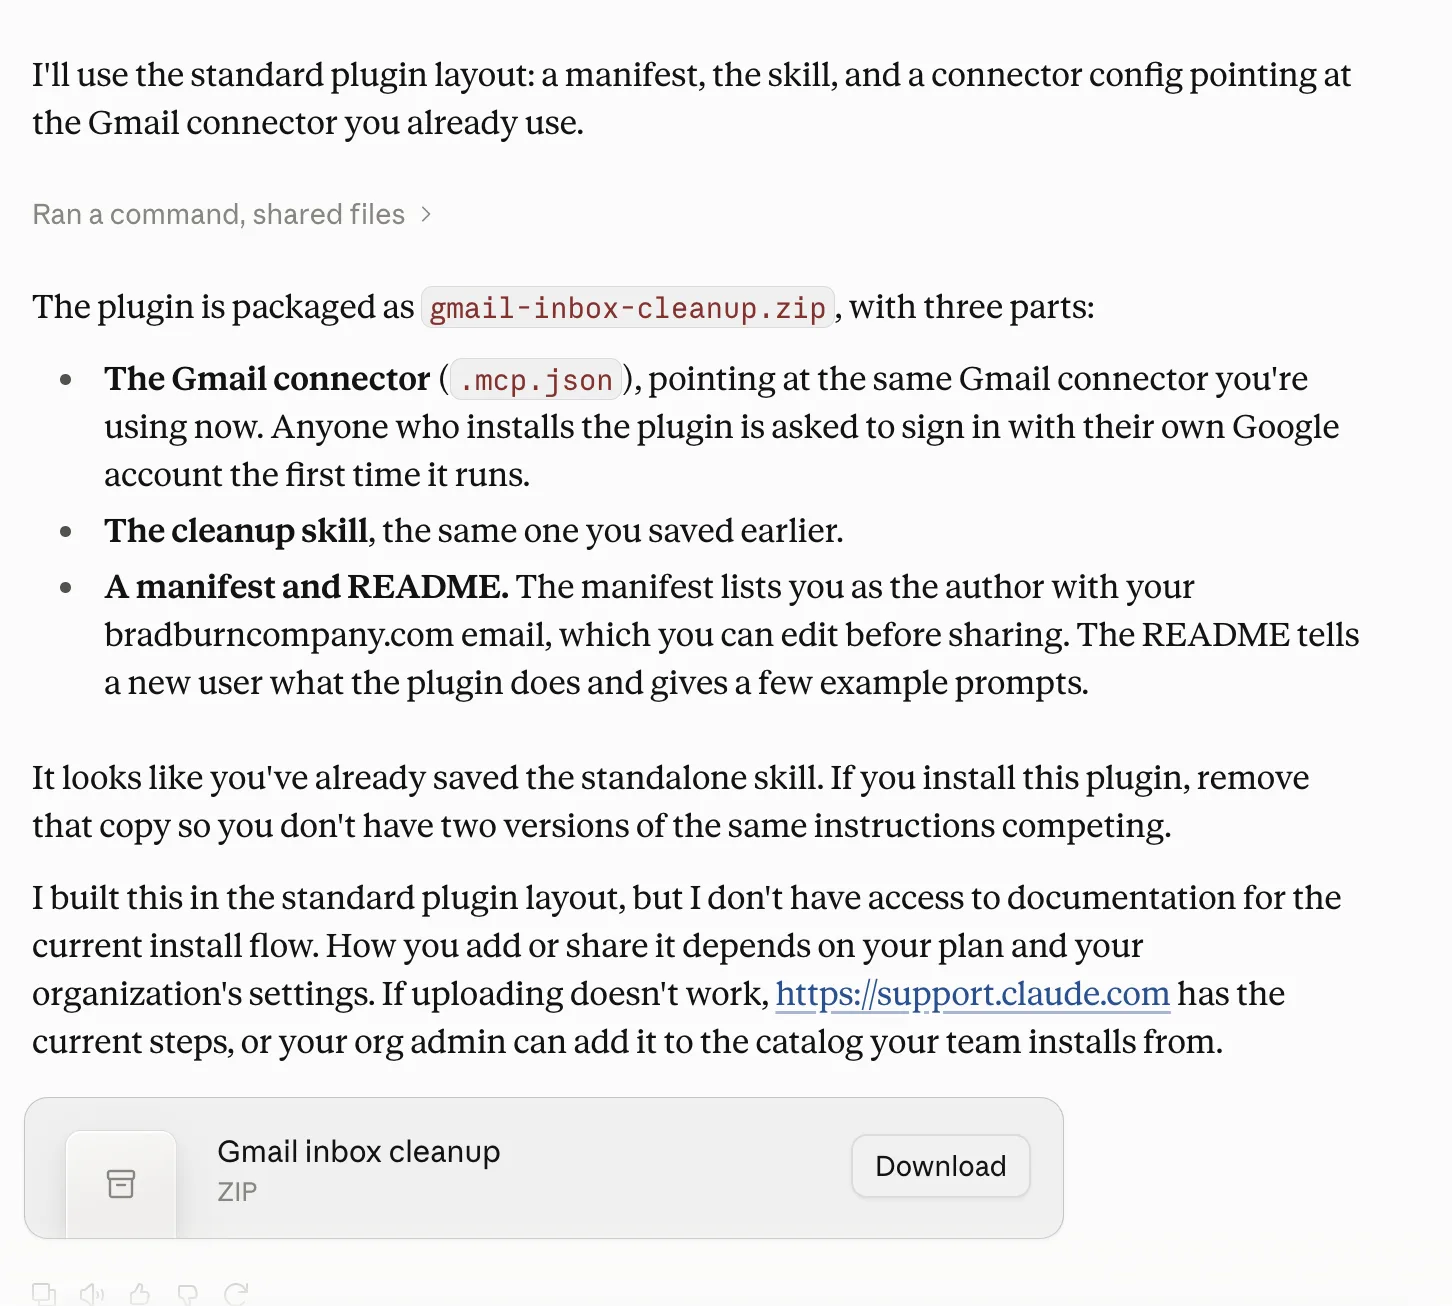
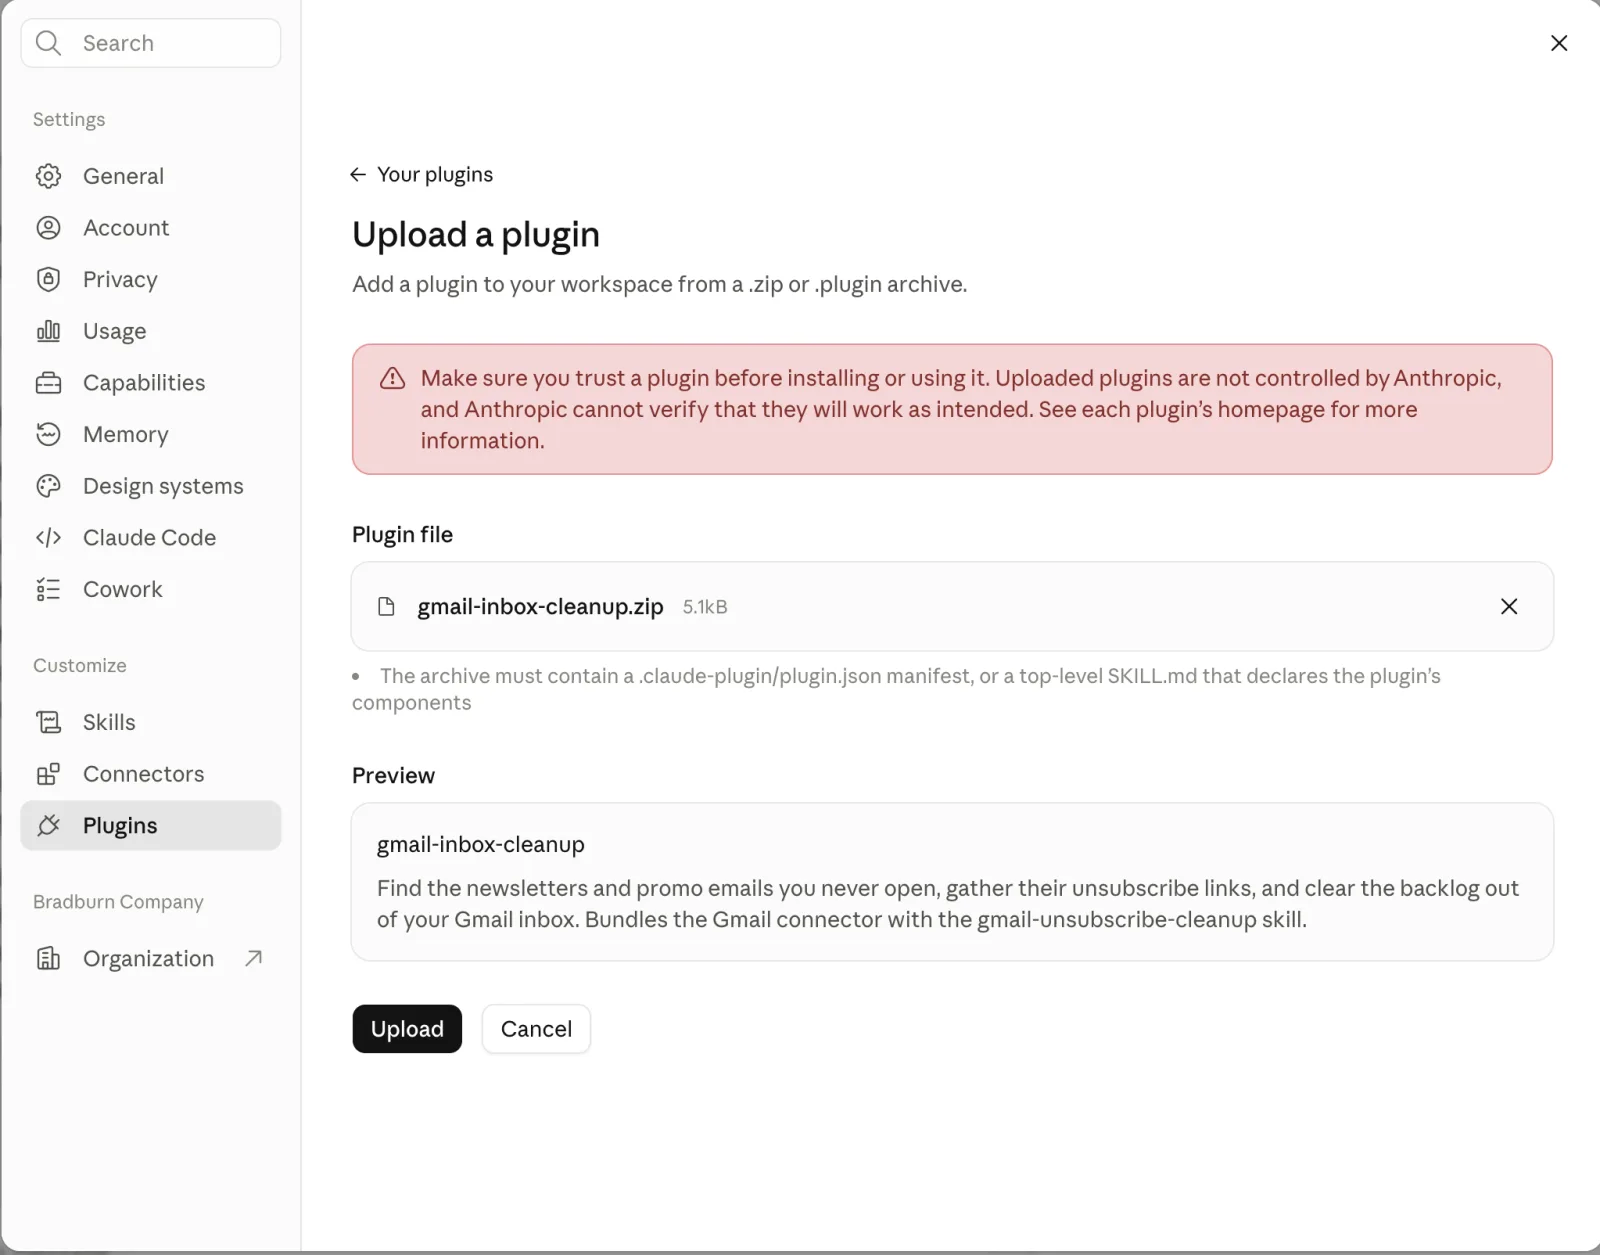
The file (gmail-inbox-cleanup.zip) lands in your browser's downloads.
If you already saved the skill on its own, remove that copy after installing the plugin so two versions don't compete.
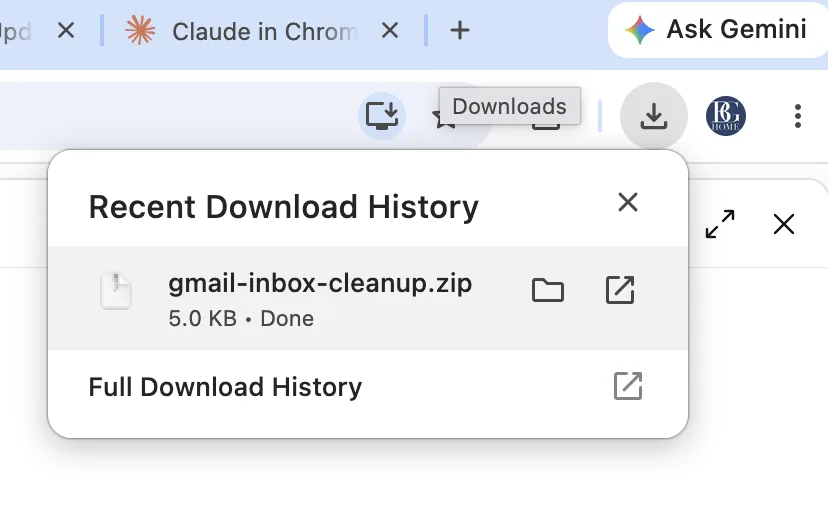
Upload it
Open Settings → Plugins (your name at the bottom left, then Settings).
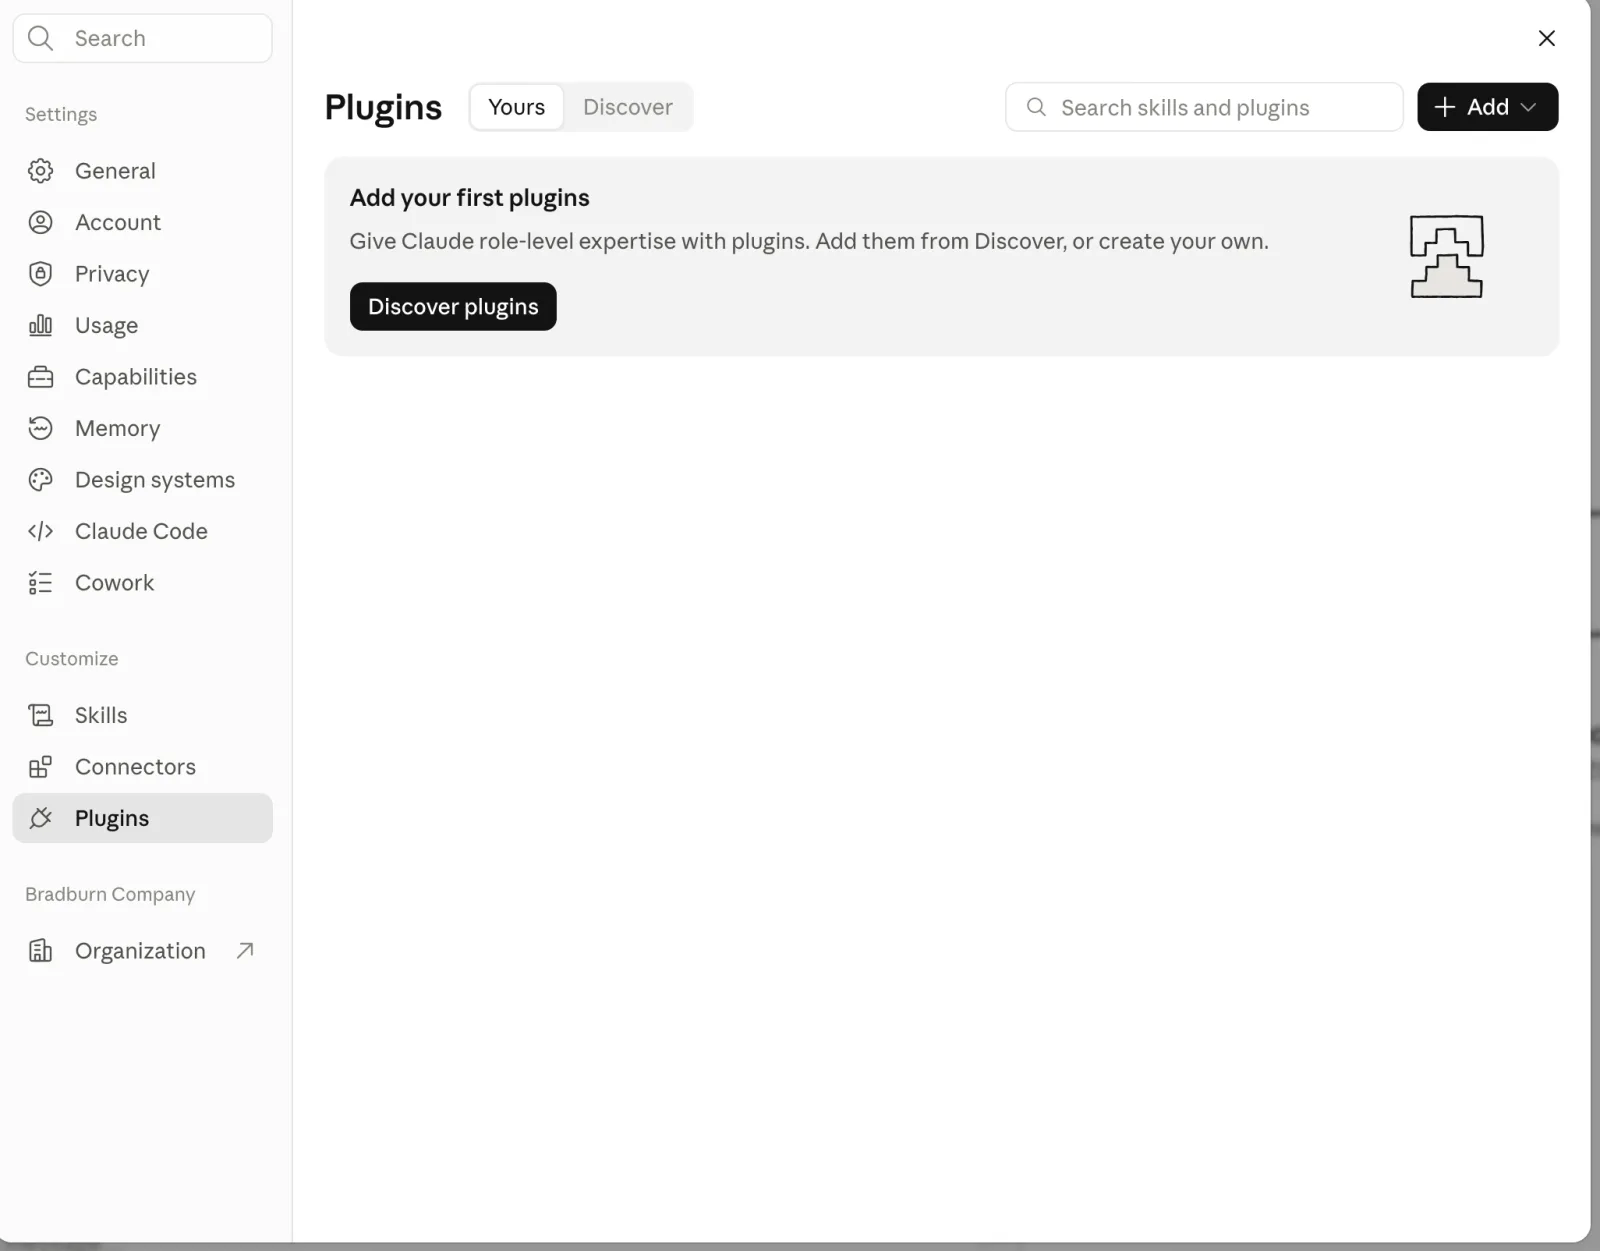
Click + Add → Upload plugin. The same menu offers Add marketplace, Create a plugin, and Create with Claude.
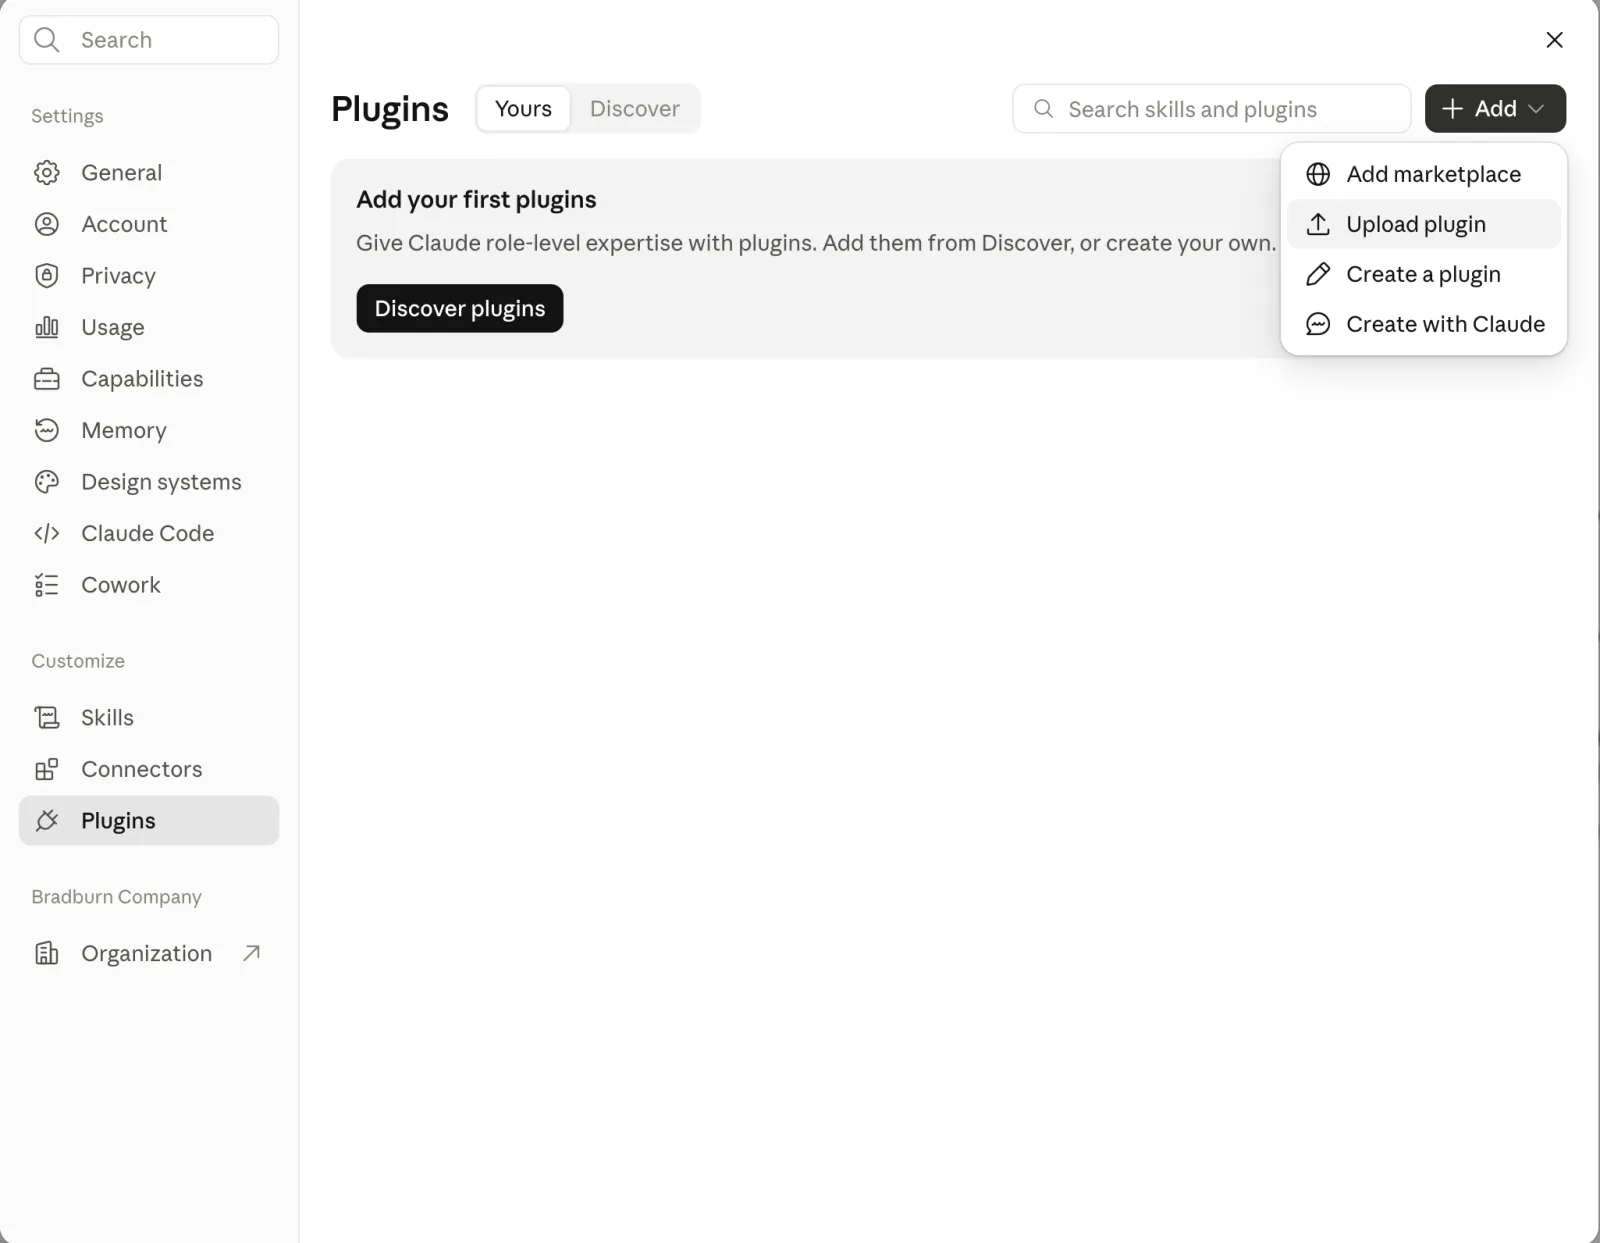
Choose the .zip (or .plugin) file, check the Preview, and click Upload. The archive needs a .claude-plugin/plugin.json manifest or a top-level SKILL.md. Only upload plugins you trust; Anthropic doesn't control uploaded plugins.
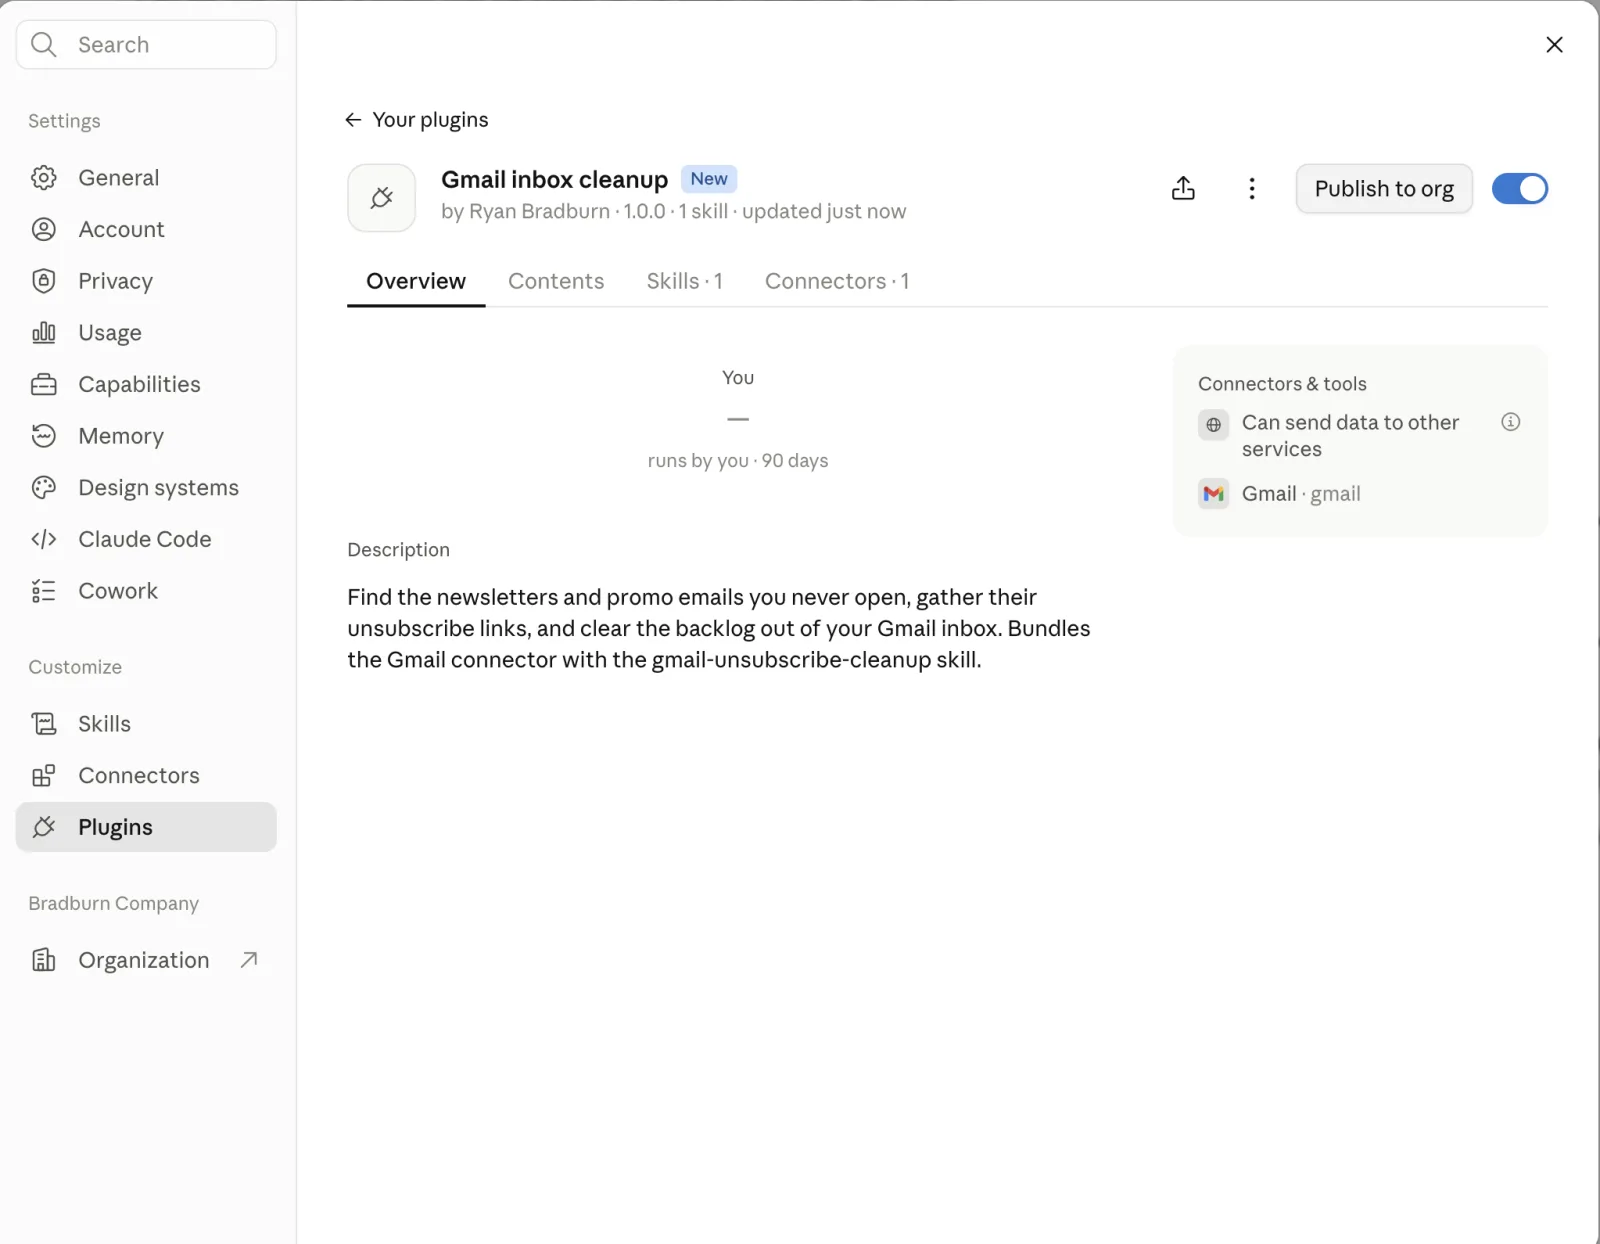
The plugin page opens with its version, skills and connectors, and what it can access ("Can send data to other services," Gmail). The toggle at the top right turns it on or off for you.
Publish it to the org
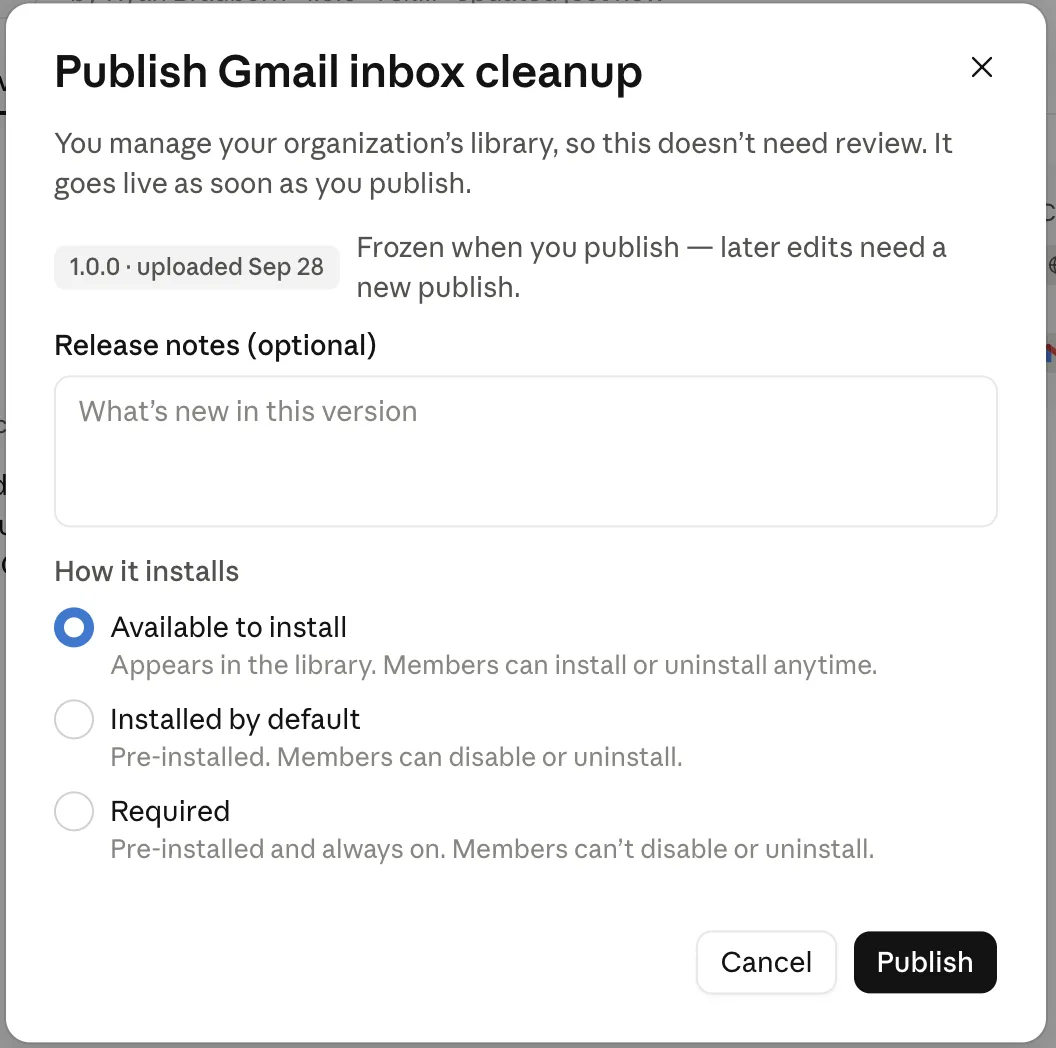
Click Publish to org, add optional release notes, pick how it installs (the same three options as skills), and click Publish. Version 1.0.0 is frozen once published.
Confirm it in Organization settings → Plugins & skills → Inventory. The plugin sits alongside the earlier skill, with its version, capabilities, and audience.
Run a skill with the / menu
Claude picks up skills on its own when a request matches, but you can also run one directly.
Type / in the message box. The menu lists Add files and your skills. Plugin skills appear under the plugin's name (here, Gmail inbox cleanup). Hover to see what one does.
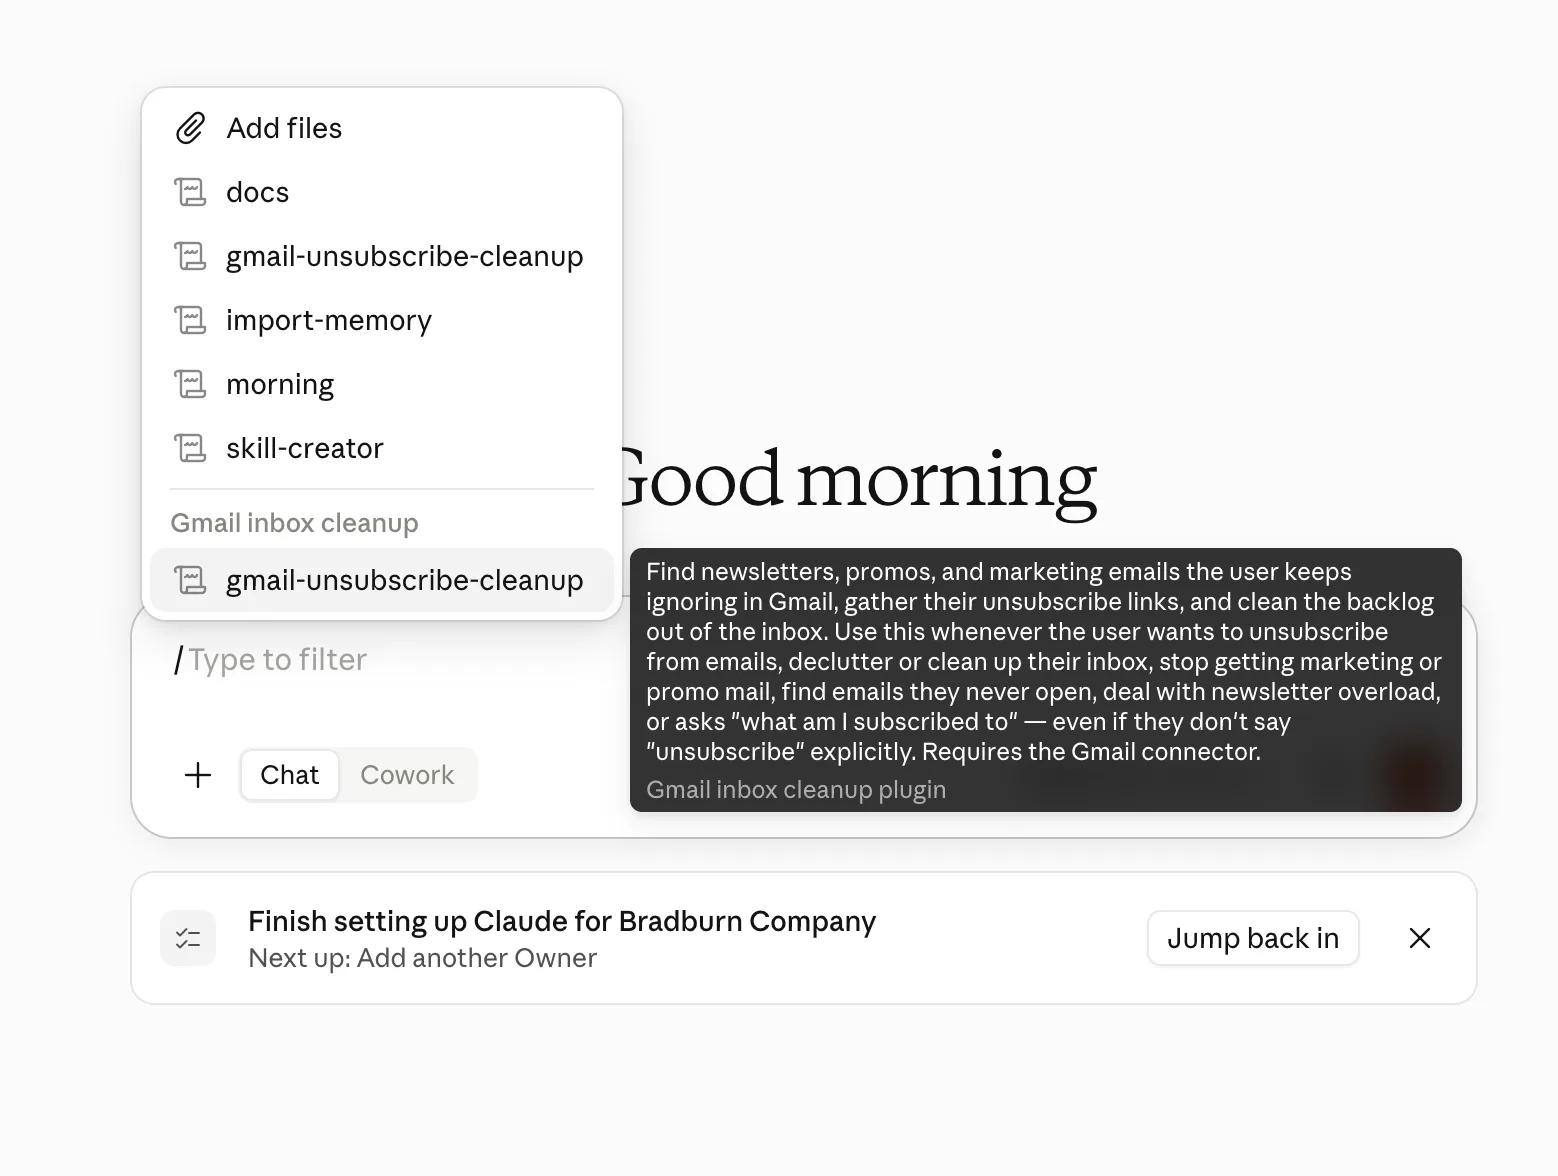
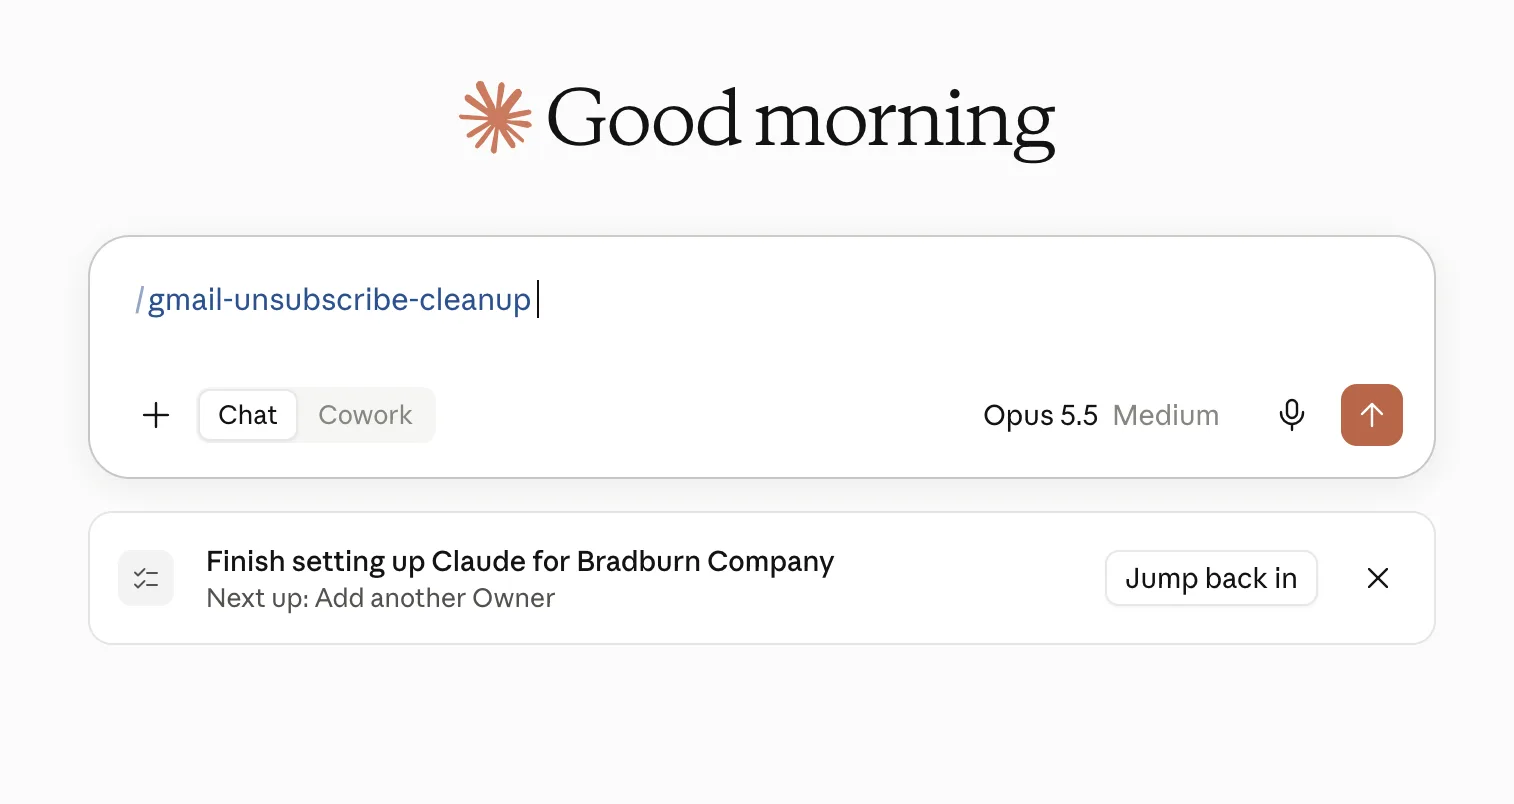
Pick the skill, or keep typing to filter. It appears as /gmail-unsubscribe-cleanup. Add any details (like a different time window) and press send.
If the skill shows up twice (standalone and from the plugin), remove the standalone copy in Settings → Skills so only the plugin version runs.
Set up a shared org project.
The org setup builds a shared project, Ask Bradburn, with your connectors tied into one place for everyone. We'll cover projects in a later post.
Start the org setup
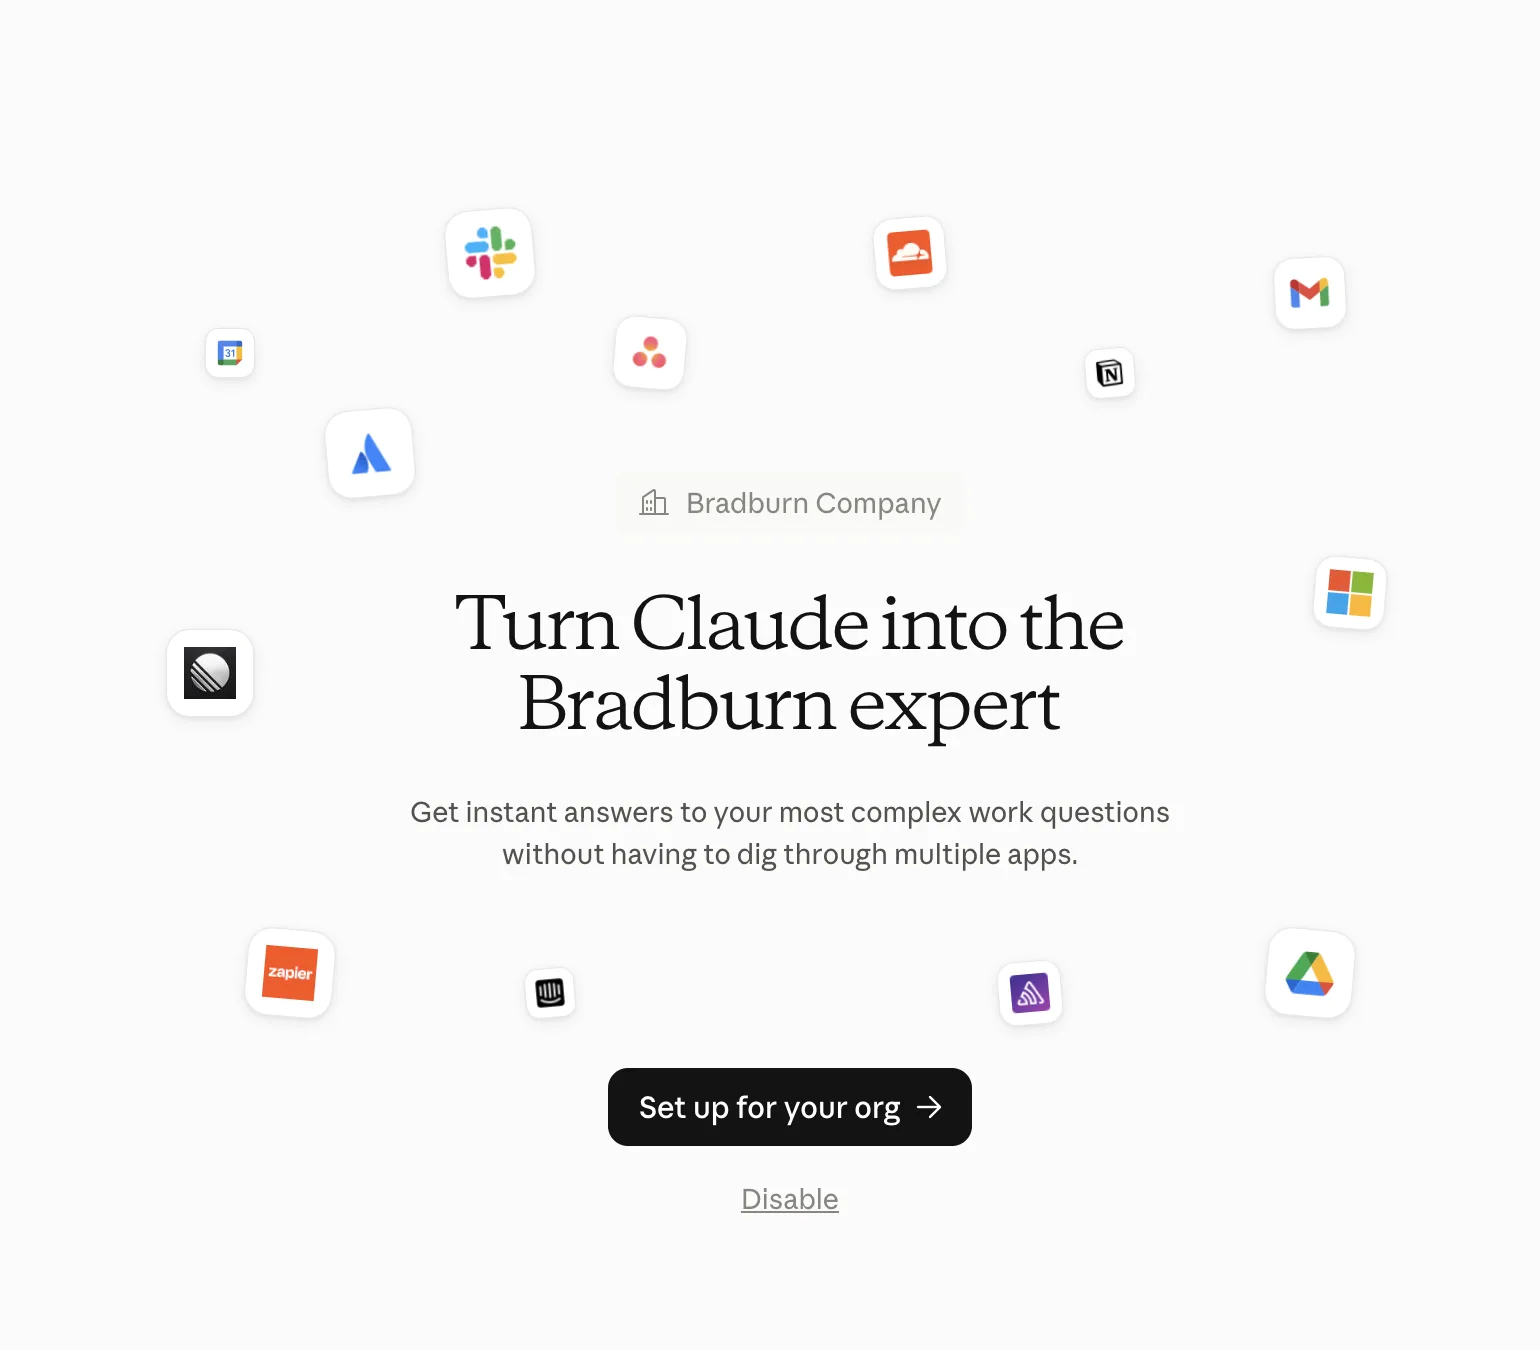
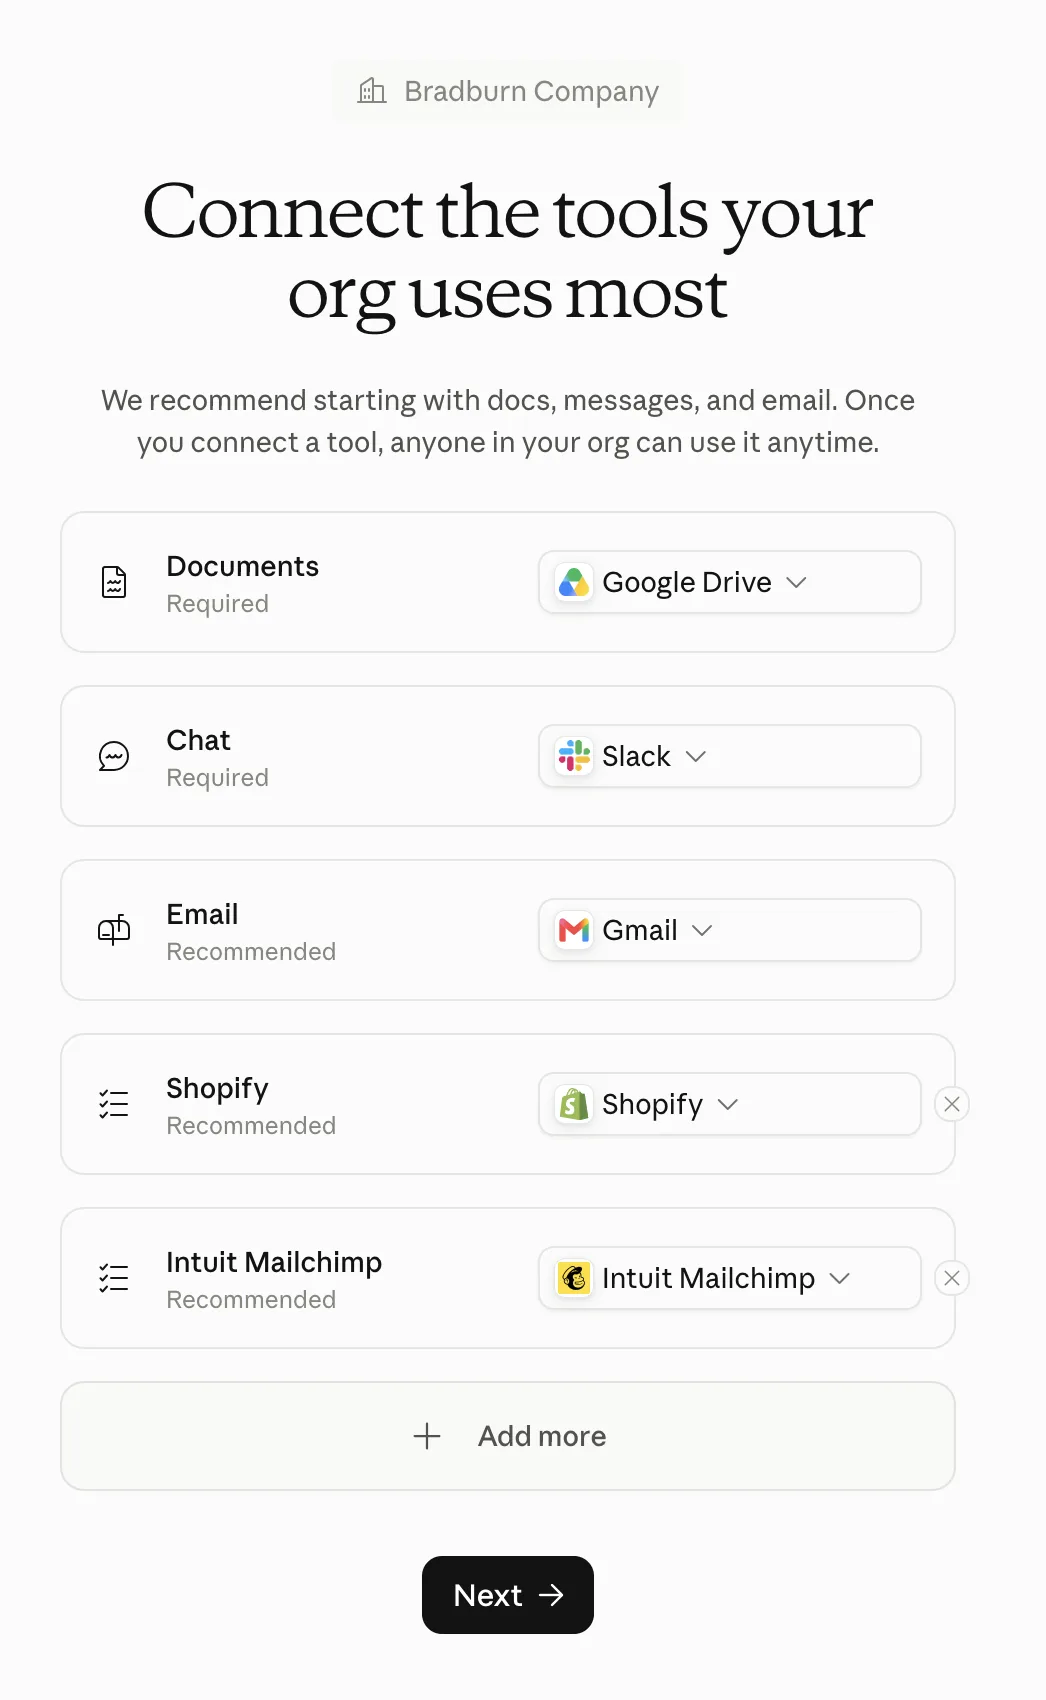
On the Turn Claude into the Bradburn expert screen, click Set up for your org. Your company name sits at the top, so you can confirm you're in the right org. Disable turns this setup off.
Add your connectors
Pick a connector from each dropdown, then click + Add more for any others that seem relevant. A handful is enough to start.
We picked Google Drive, Slack, and Gmail, then added Shopify and Intuit Mailchimp. The X at the end of a row removes one. Click Next when you're done.
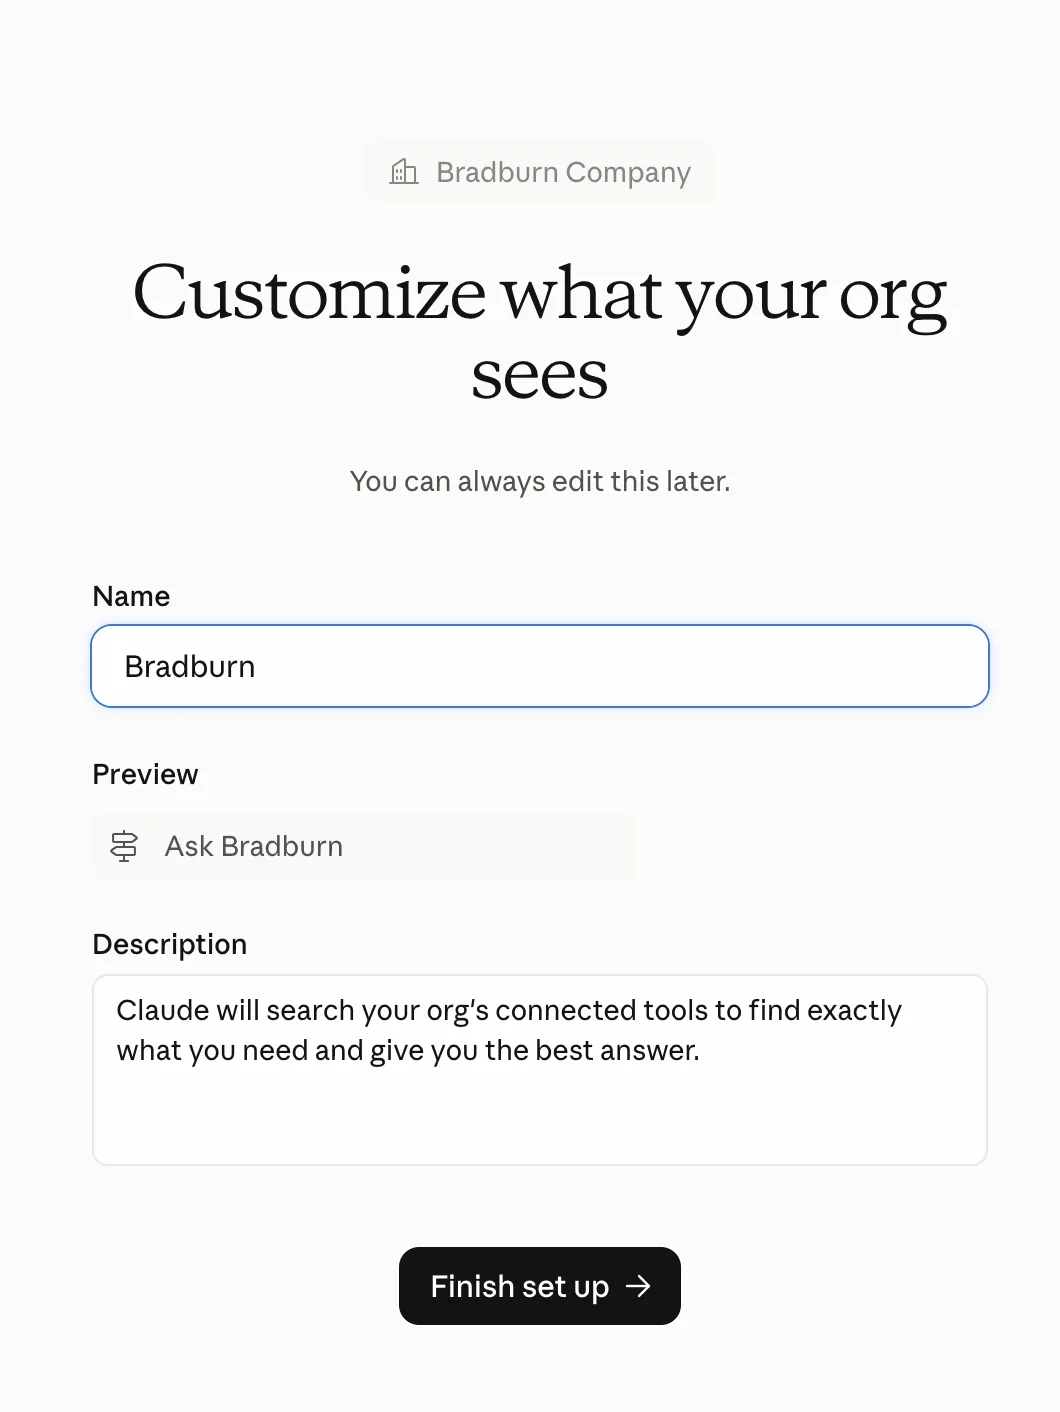
Customize what your org sees
This creates your first project, Claude's shared workspace. For now, it ties all your connectors into one place. Set how it looks to everyone, then click Finish set up. You can edit all of it later.
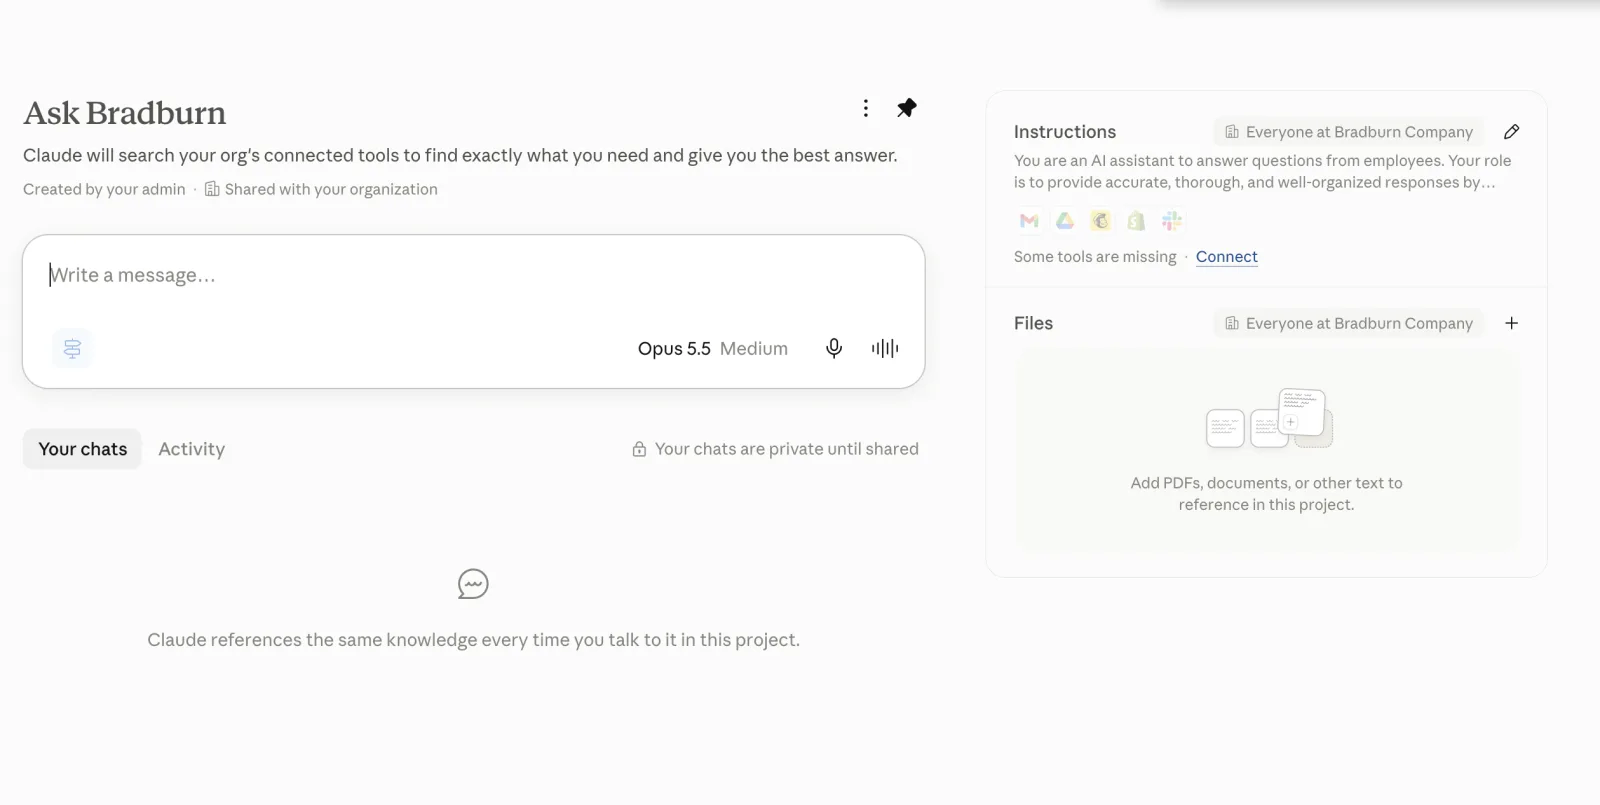
Use the Ask Bradburn project
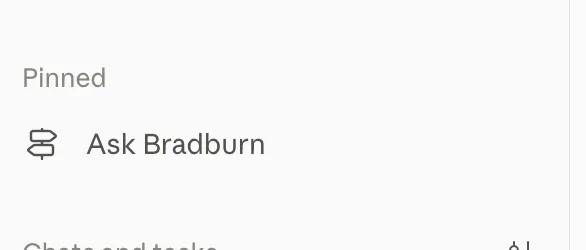
After setup, Ask Bradburn sits under Pinned in everyone's sidebar. For now, you're mostly here to sign in to your connectors in the next step. Type a question in the message box to start a chat.
Connect your accounts
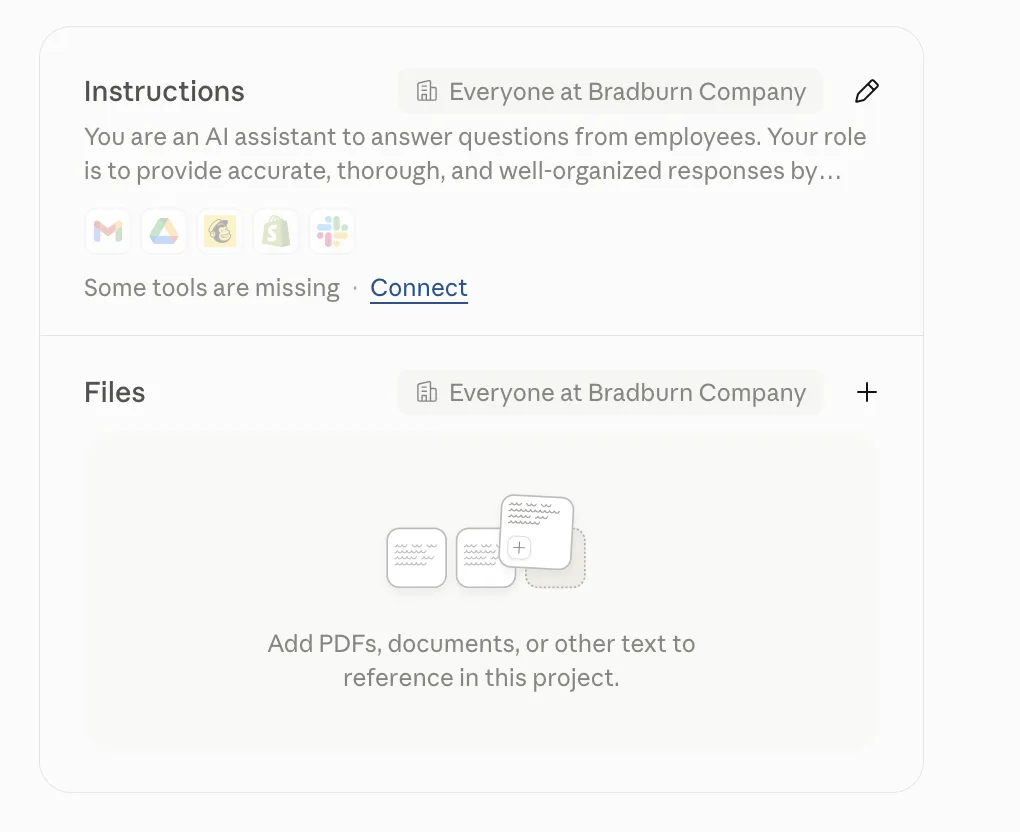
Each person connects their own accounts before Claude can search them. Faded tool icons and Some tools are missing mean you have tools left to connect.
On the Ask Bradburn project page, click Connect next to "Some tools are missing."
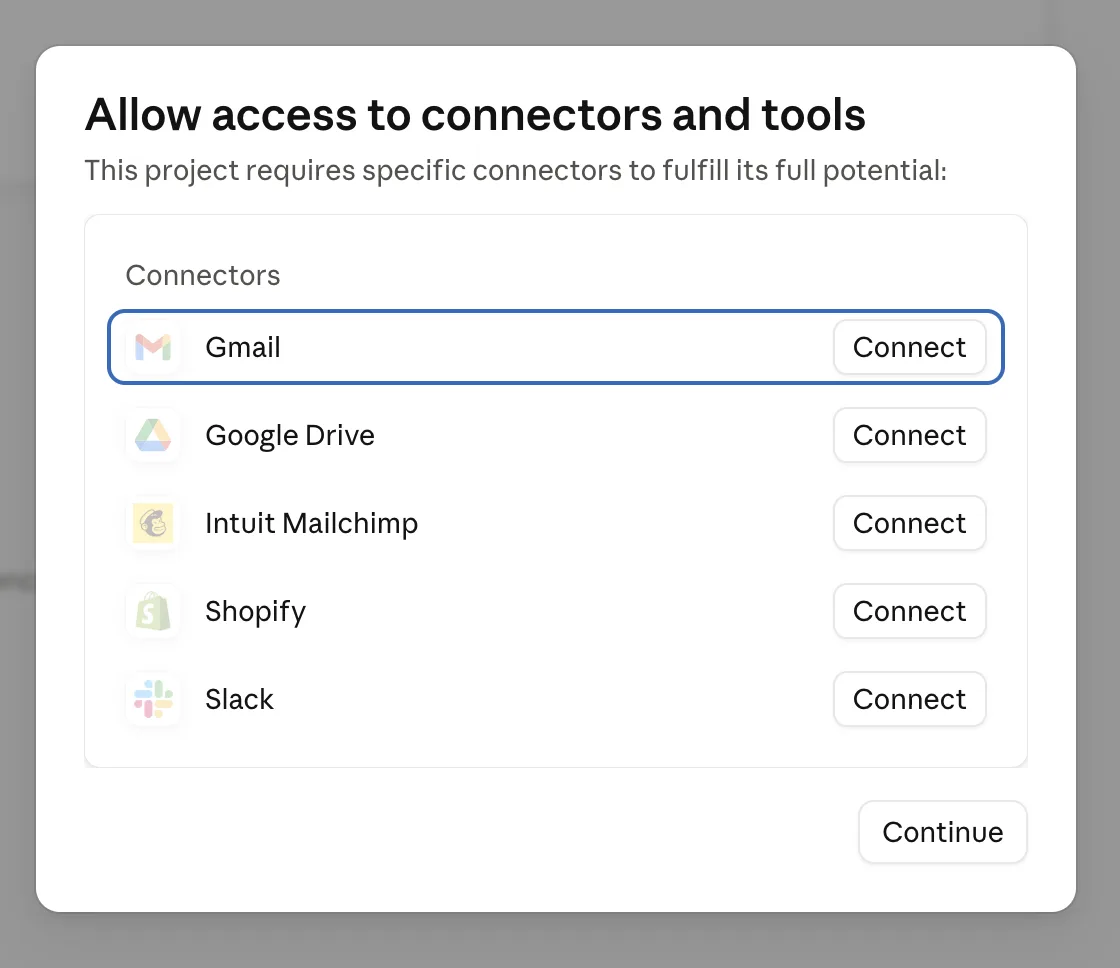
In Allow access to connectors and tools, click Connect next to each tool and sign in when prompted.
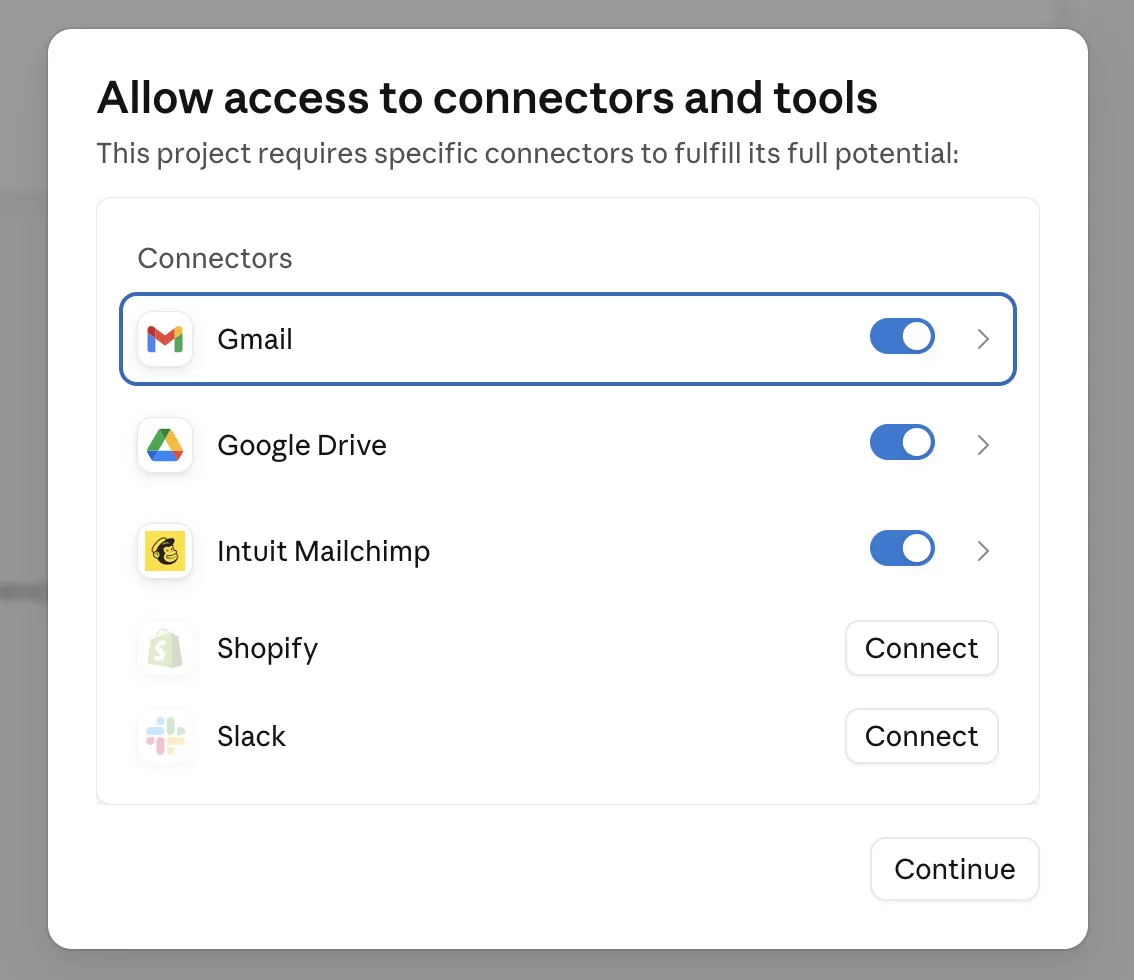
Connected tools switch to a blue toggle. The arrow beside a toggle opens that tool's settings. Repeat for the rest, then click Continue.
The next step
You don't need permission to build your own tools now.
We lay the AI foundation. Your whole team starts building.